Wedding Planning Services Pro Documentation
Your awesome theme / template documentation
Introduction
- Theme Name : Wedding Planning Services Pro
- Author : misbahwp
- Support Forum : https://www.misbahwp.com/pages/community/
- License : GNU General Public License v3 or later
- Discription : The Premium Wedding Planning WordPress Theme is designed for creating professional websites for wedding planners, event organizers, decorators, photographers, and wedding service providers. The theme includes structured layouts for service pages, wedding galleries, event portfolios, testimonials, pricing packages, and contact forms. It focuses on clean design, organized content sections, and responsive layouts so wedding websites can be viewed properly on desktop, tablet, and mobile devices. The theme also includes homepage sections to highlight wedding services, featured events, client testimonials, and vendor information.
How to Establish the Theme
Setup Theme
Template installation is very simple process.
You can also install your theme using WP Admin
he first task is to log in to your WordPress admin area. Next, click on
1. In dashboard click on Appearance >> Themes
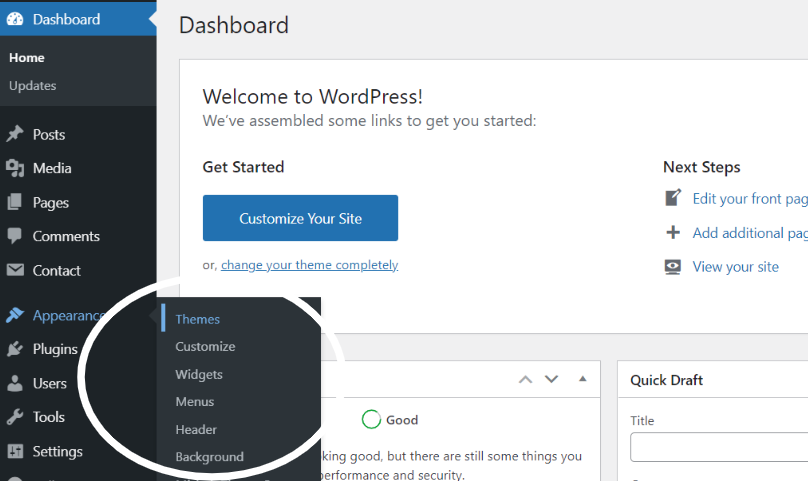
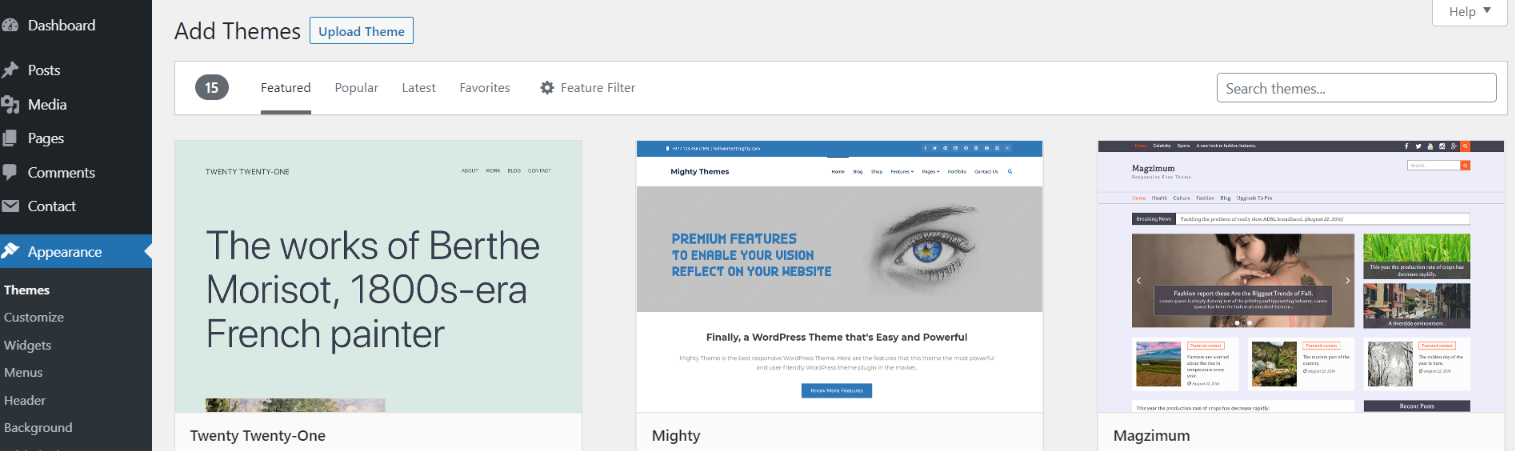
2. Click on the Add New button at the top of the themes page once page is loaded
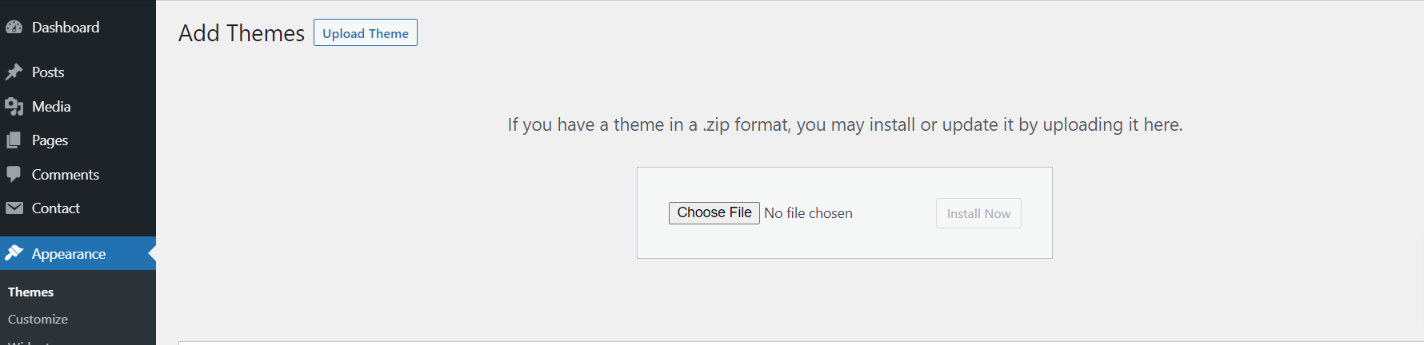
3. Click the button labelled as 'Upload Theme'.
Select the wedding-planning-services.zip theme from the Browse Button, then click the Install Now button
5. WordPress will now install your theme and display a success message, as well as a link to activate or to see the live preview. Congratulations on completing the installation of your theme.
Demo Importer
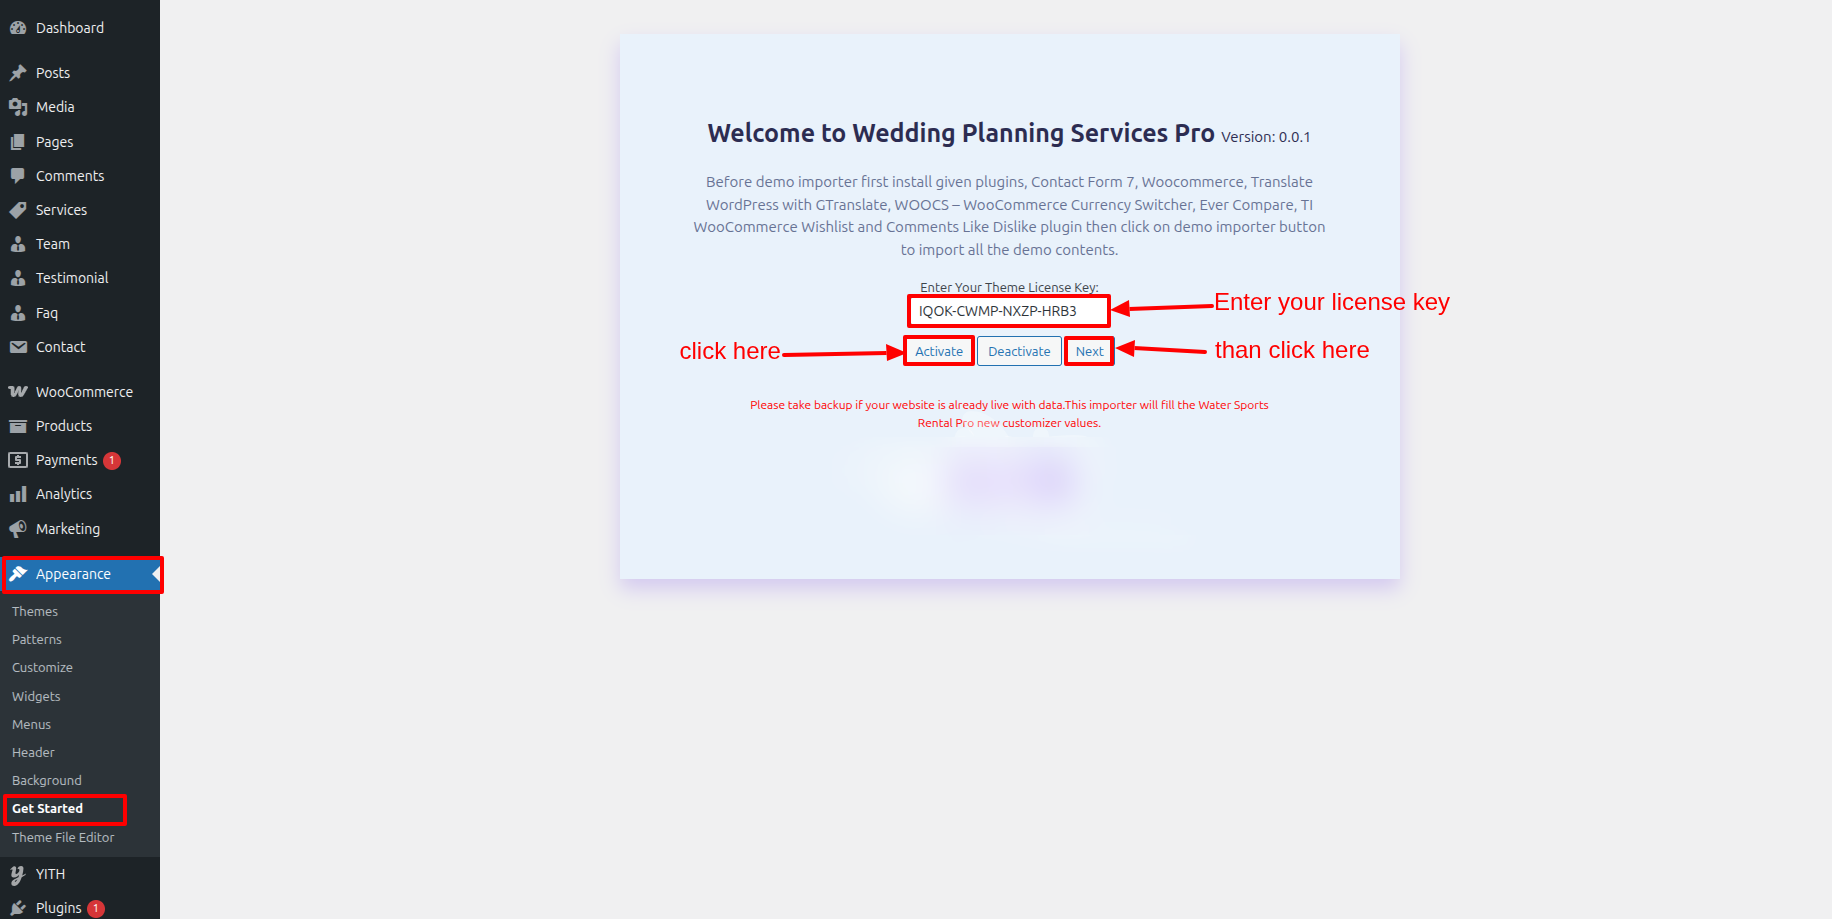
Follow below instructions to setup wedding-planning-services theme.
In the Dashboard, go to Appearance >> Get Started >> Activate
Once you are on the Wedding Planning Services Pro themes setup, click on the start button.
In the Dashboard, go to Appearance >> Get Started >> Run Importer

As the demo importer process finish then check your site, all the content will imported and theme will display like live demo.
Necessary Plugins
When you initially activate the theme, you'll be asked to install these plugins on your Dashboard. You can ignore the message if you don't want to install these plugins on theme activation, and if you change your mind later, you can install them manually.
In the Dashboard, click on Plugins >> Install Plugins.
Contact Form 7
Plugin download link Contact Form 7
Font Awesome
Plugin download link Font Awesome
Wedding Planning Services Pro Posttype
Plugin download link Wedding Planning Services Pro Posttype
WooCommerce
Plugin download link WooCommerce
YITH WooCommerce Wishlist
Plugin download link YITH WooCommerce Wishlist
Setup Menu
Setup Menu
In the dashboard, go to Appearance >> Menu
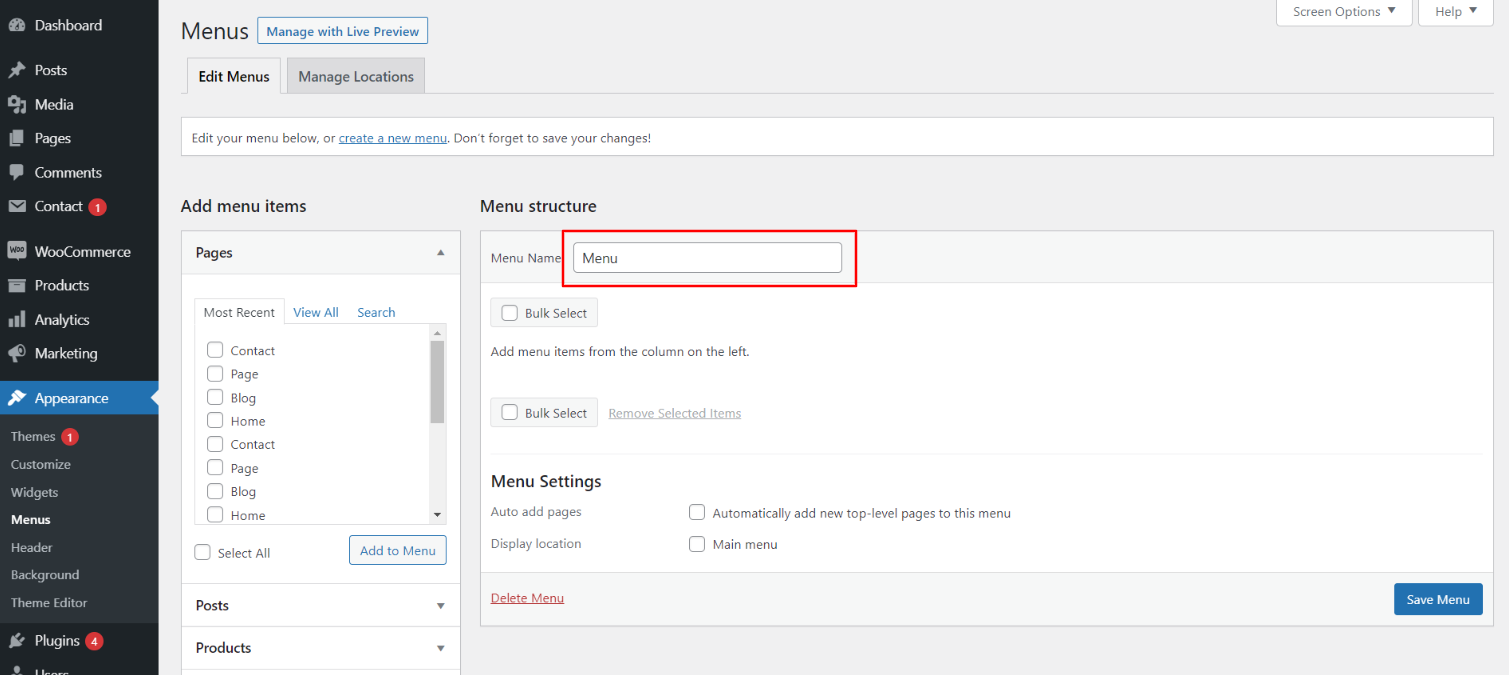
From the 'Appearance' menu on the left-hand side of the Dashboard, select the 'Menus' option to bring up the Menu Editor.
Select Create a new menu at the top of the page. Enter a name for your new menu in the Menu Name box. Click the Create Menu button.
Your new custom menu has now been defined.
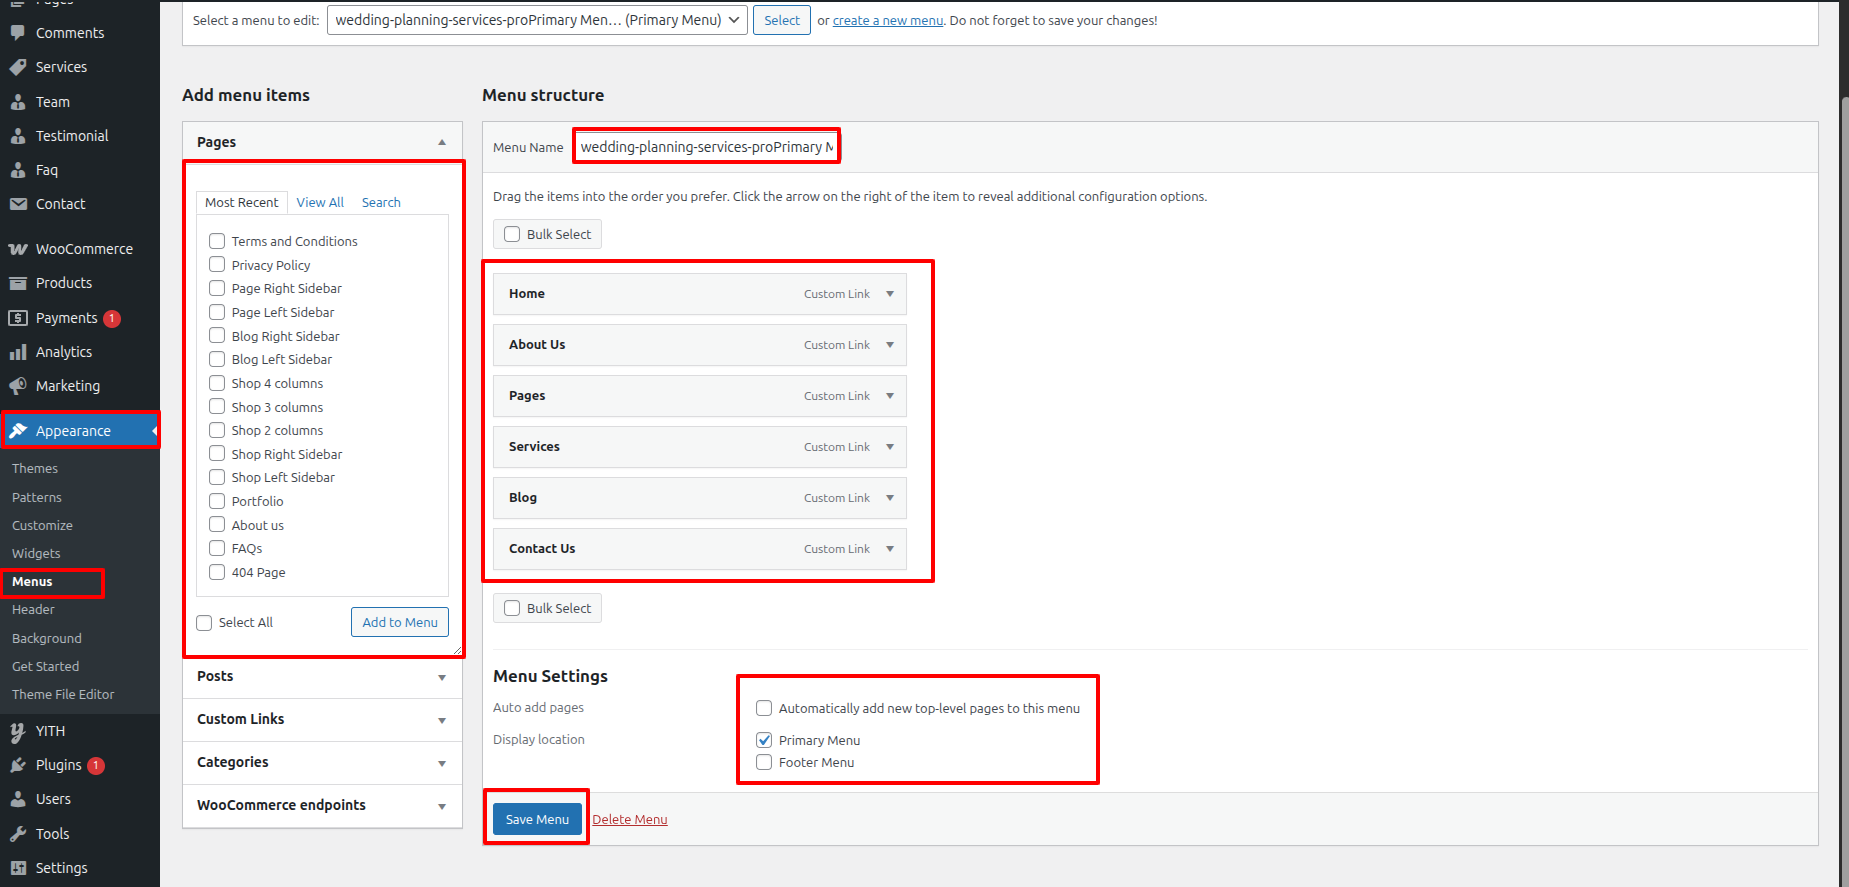
Adding Items to a Menu
Select the Pages that you want to add by clicking the checkbox next to each Page's title.
Click the Add to Menu button located at the bottom of this pane to add your selection(s) to the menu that you created in the previous step.
Click the Save Menu button once you've added all the menu items you want.
Your custom menu has now been saved.
In front end, it will look like this.

Wedding Planning Services Pro Theme Setup
Logo Setup
In order to proceed with Theme Logo setup, you can set site title and tagline, follow the instructions given below.
In the Dashboard, go to Appearance >> Customize >> Site Identity >> Logo Or Set Title and Tagline You can also Enable / Disable Site Title and Tagline
In front end, it will look like this.

Header Setup
In order to proceed with Theme Header setup, follow the instructions given below.
In the Dashboard, go to Appearance >> Customize >> Theme Settings >> Header >> Header Settings
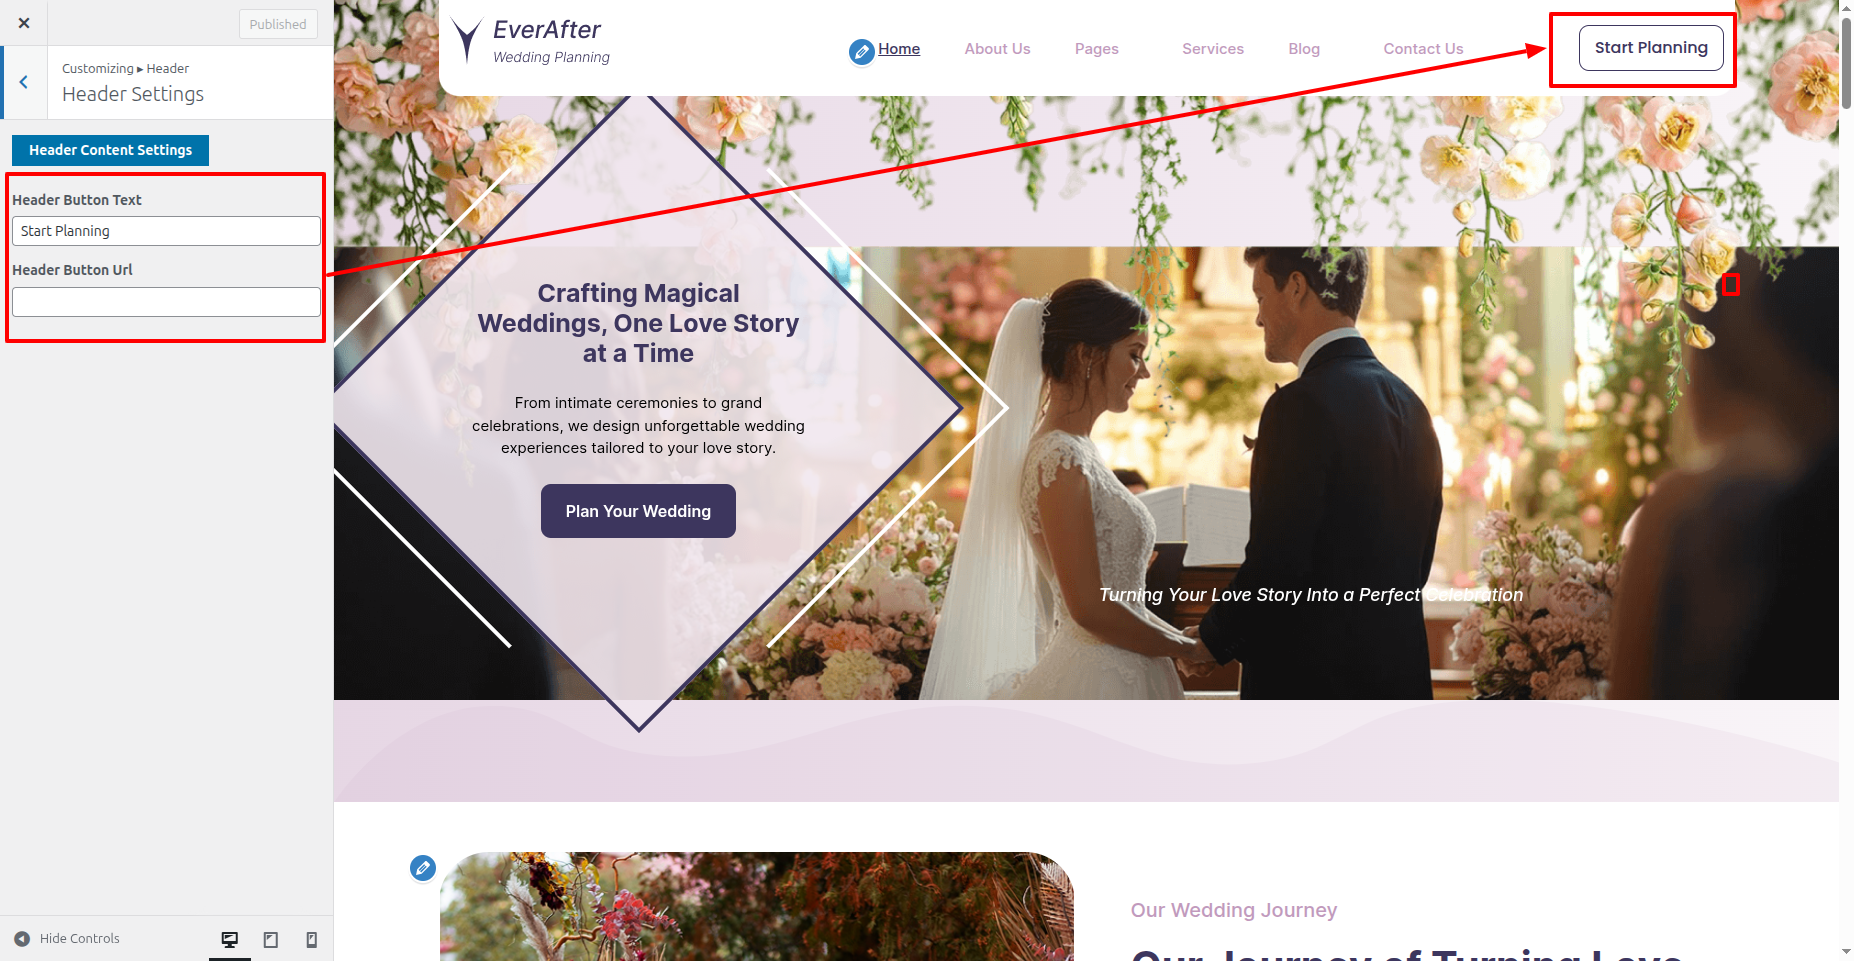
In front end, it will look like this.
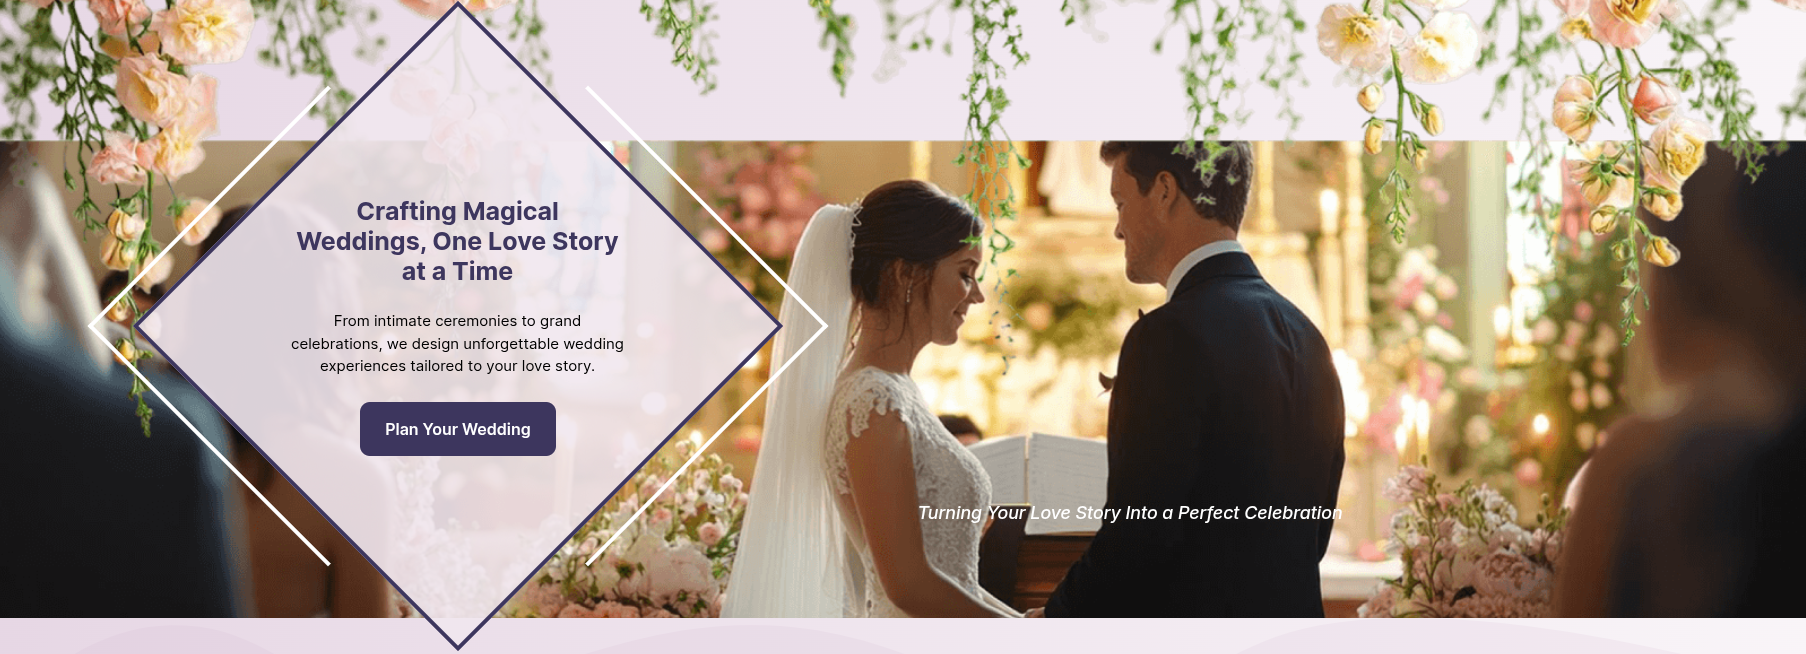
Banner Section
Banner Settings
In order to proceed with Theme Banner Settings , you can set slide show , follow the instructions given below.
In the Dashboard, go to Appearance >> Customize >> Theme Settings >> Banner Section >> Text and Image Settings
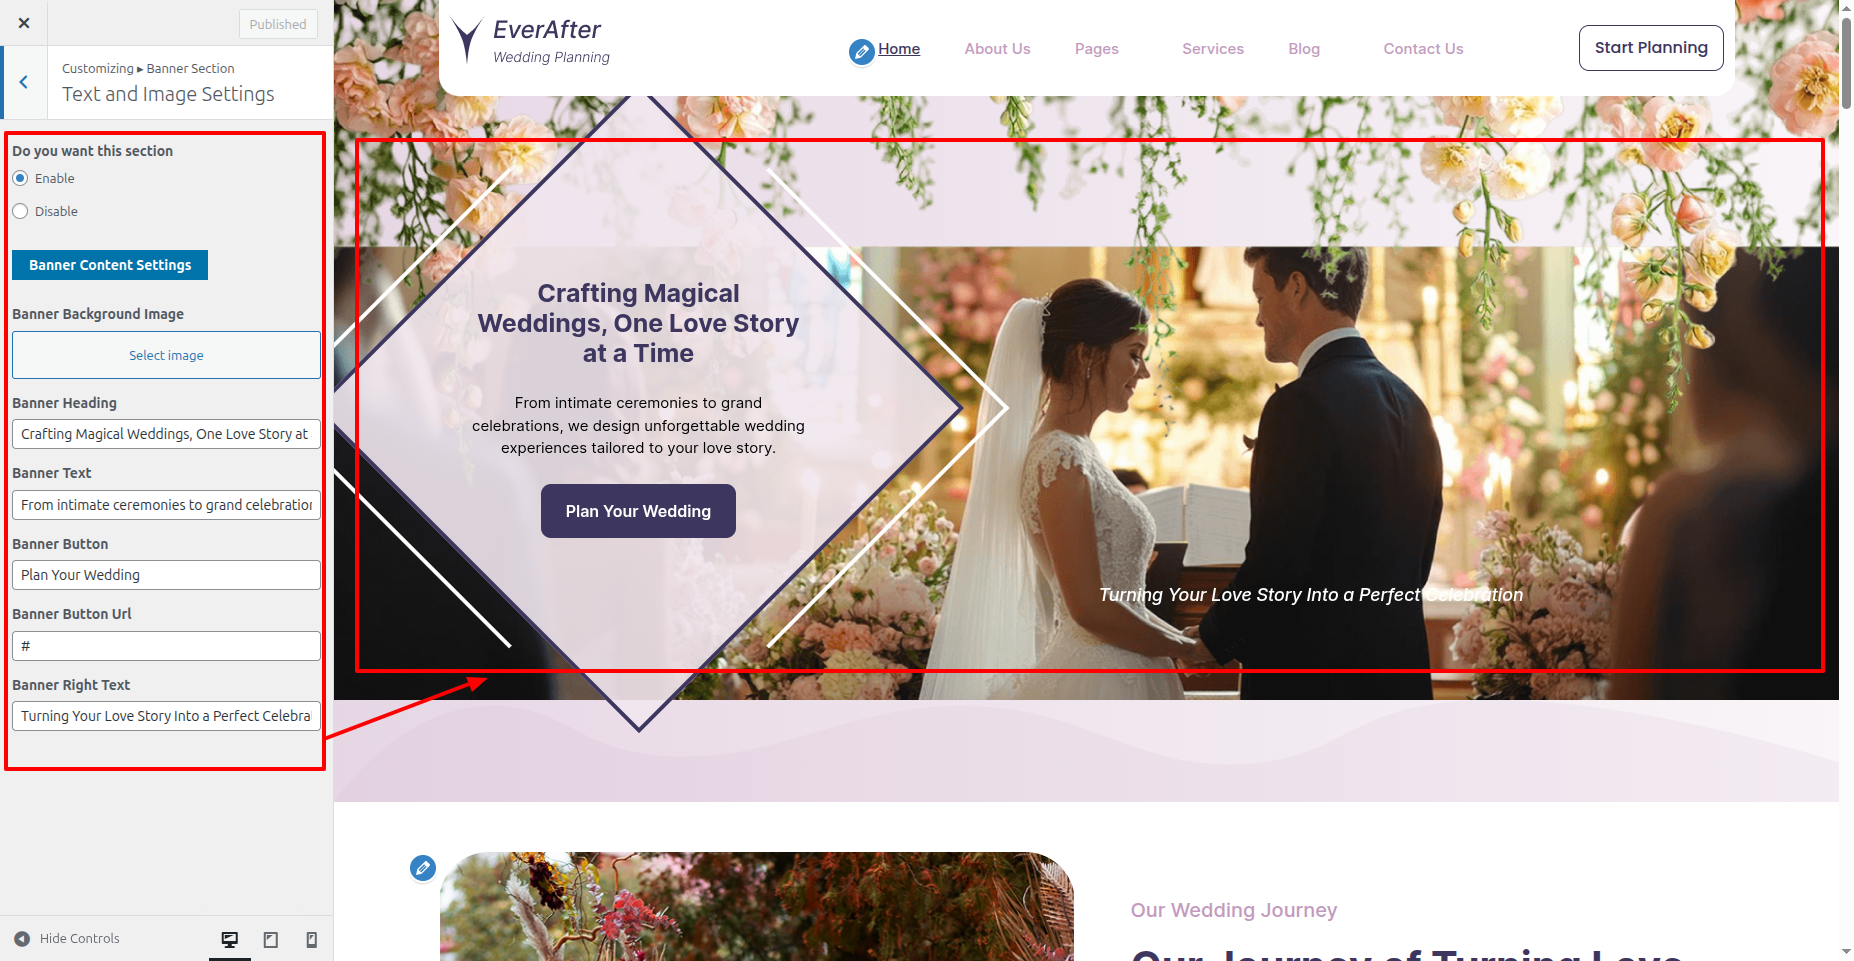
In front end, it will look like this.
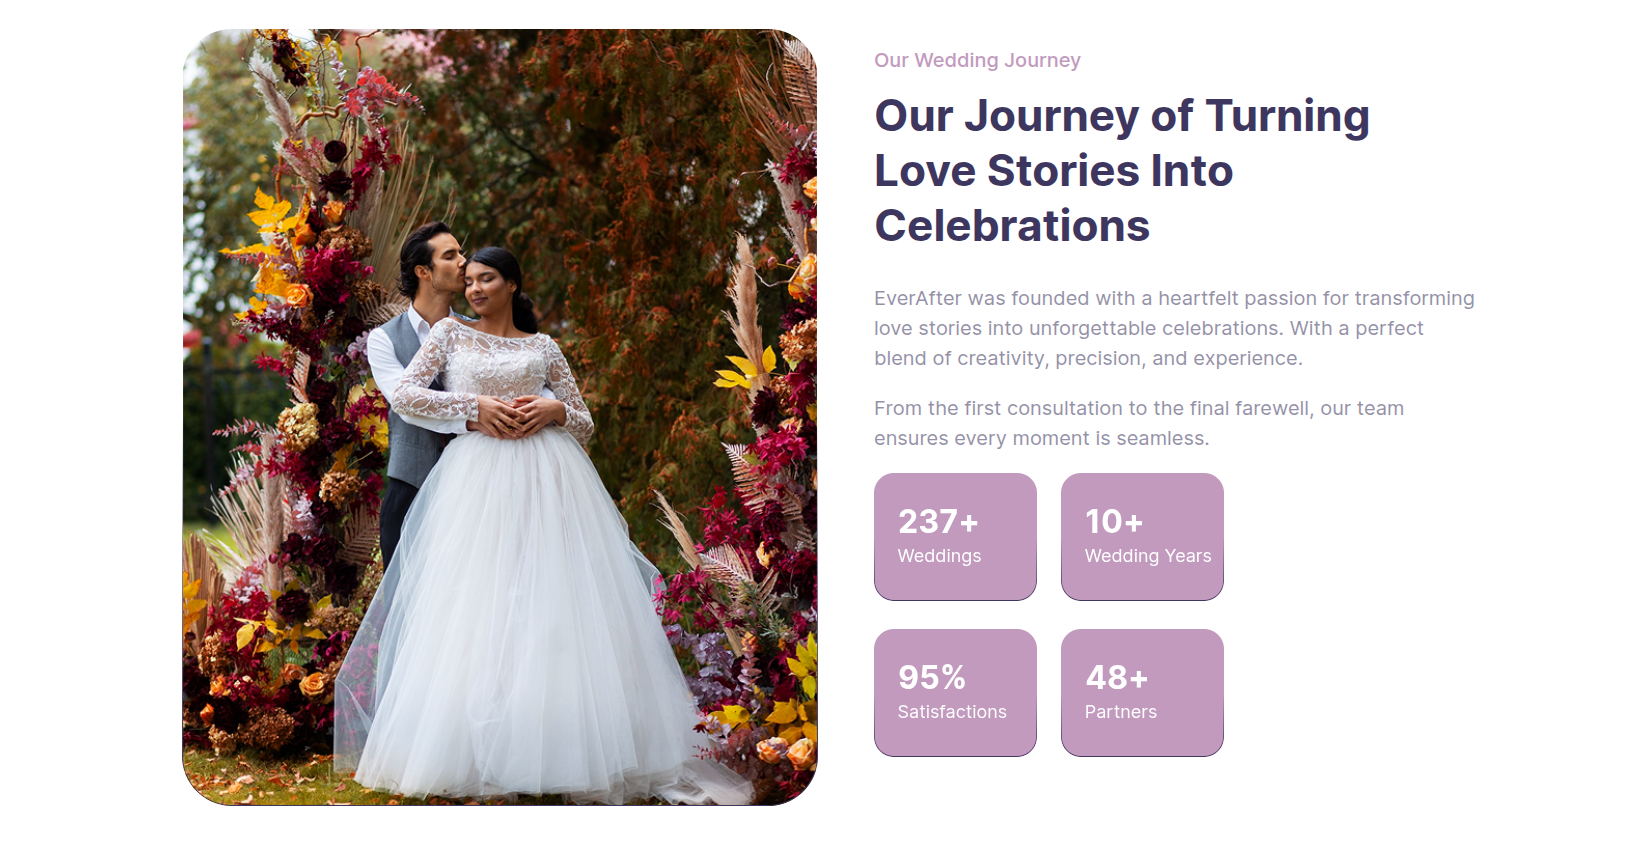
Our Story Section
Our Story Settings
In order to proceed with Our Story Settings follow the instructions given below.
In the Dashboard, go to Appearance >> Customize >> Theme Settings >> Our Story Section >> Text and Image Settings
You can set heading and content for this section.
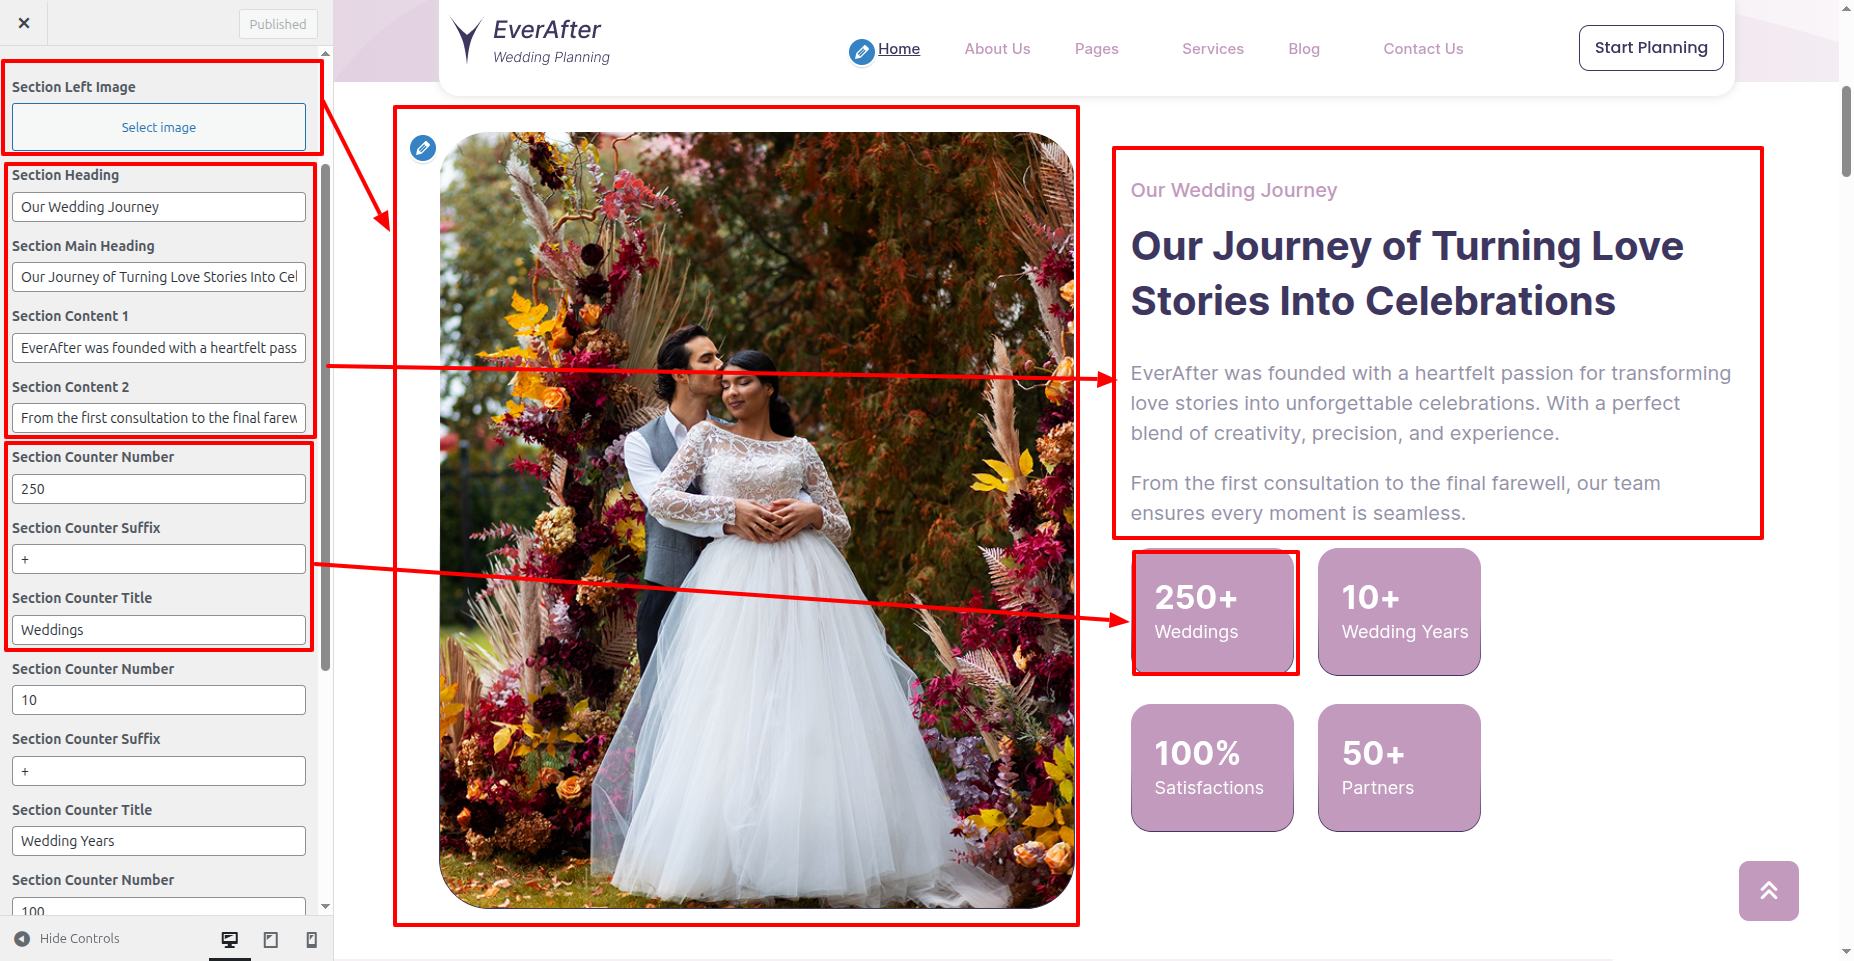
In front end, it will look like this.
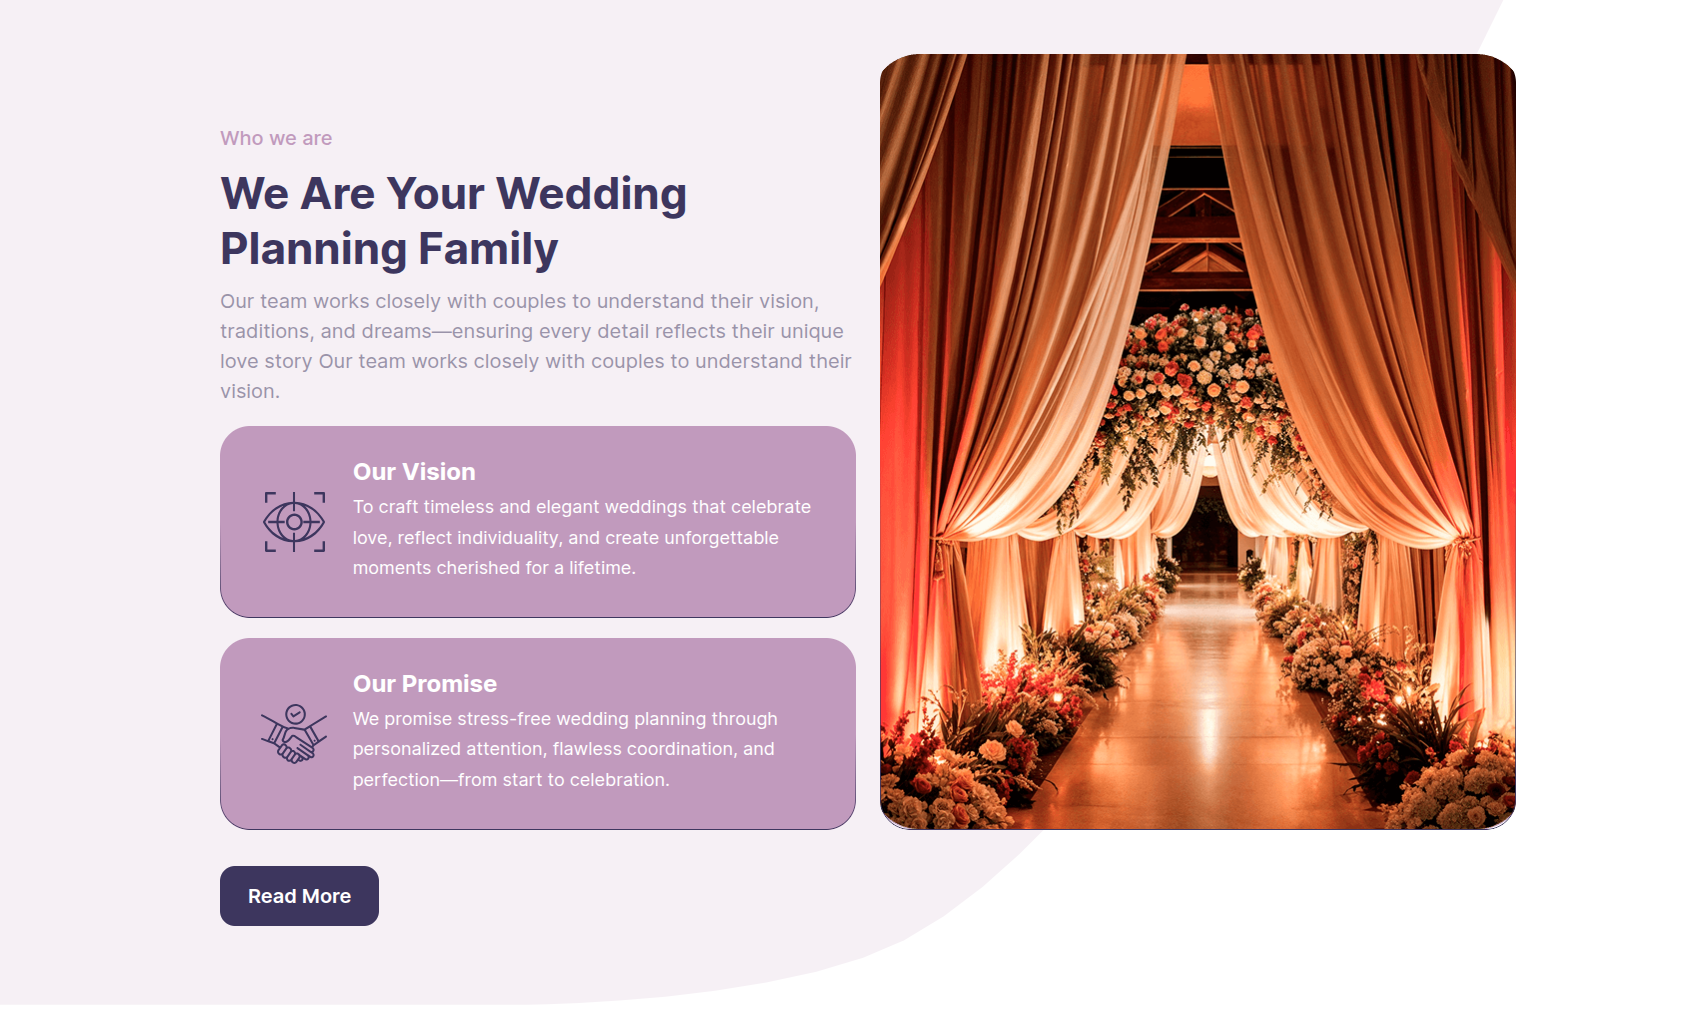
Who we are Section
Who we are Settings
In order to proceed with Who we are Settings follow the instructions given below.
In the Dashboard, go to Appearance >> Customize >> Theme Settings >> Who we are Section >> Text Settings
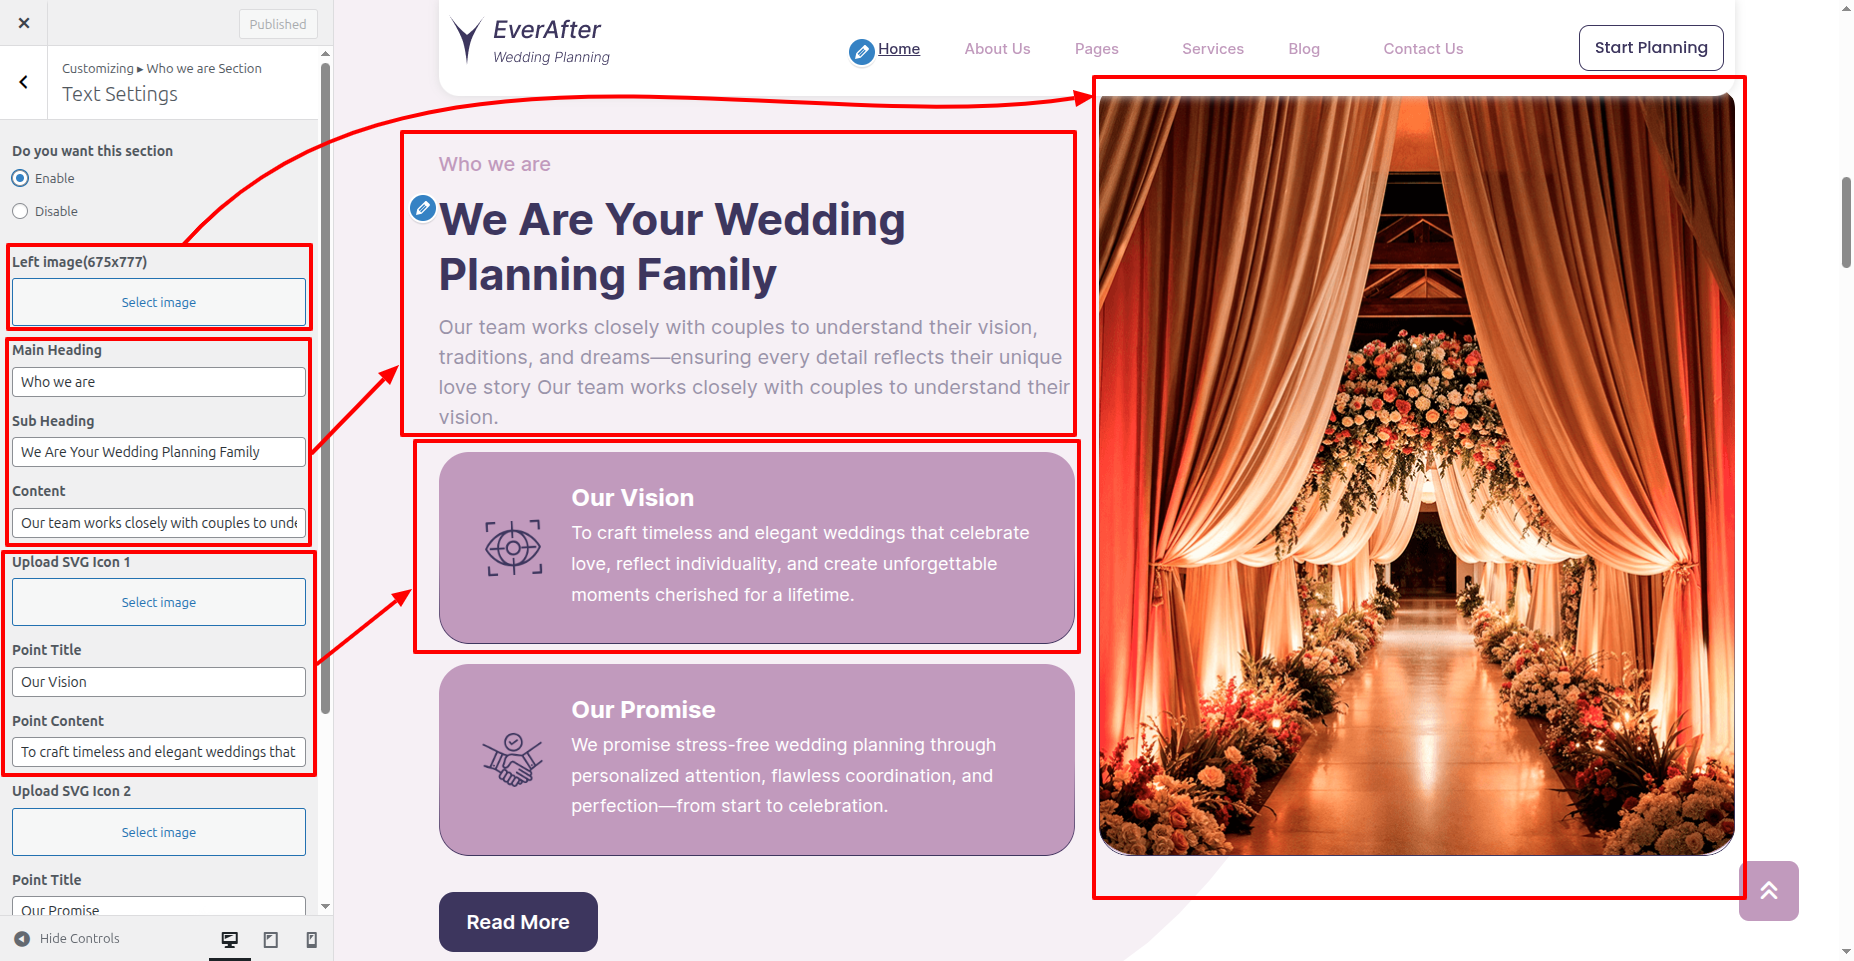
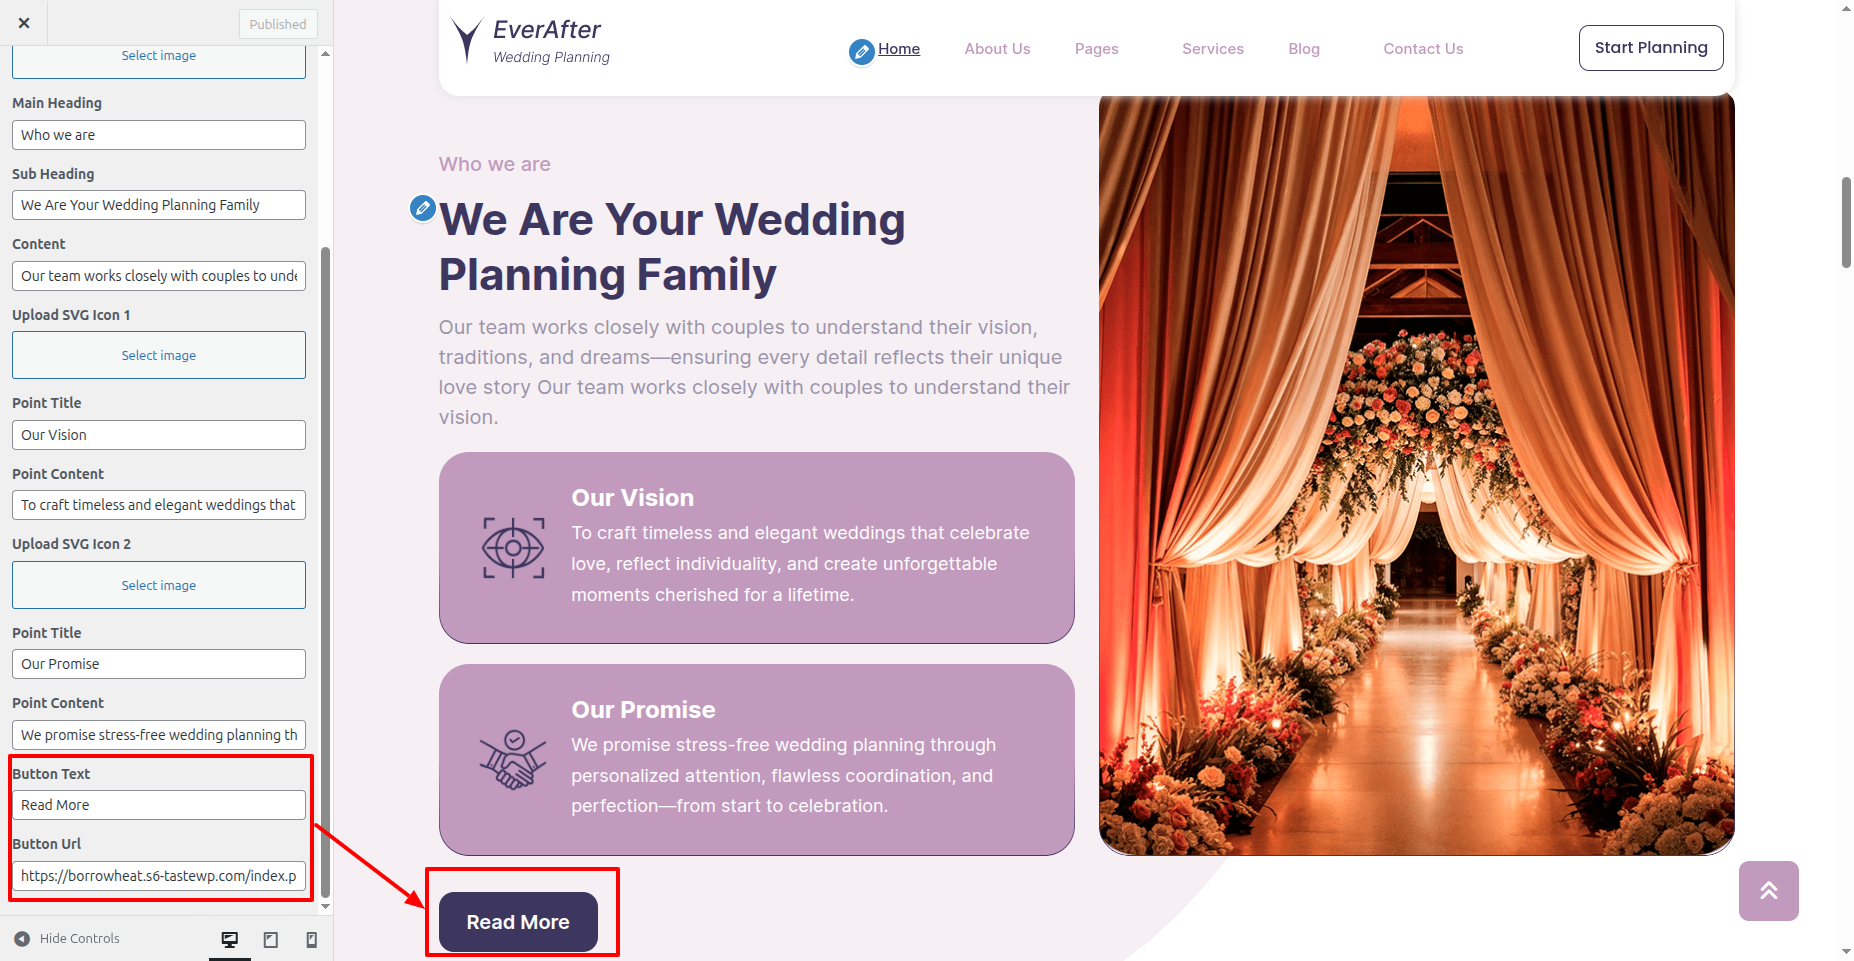
In front end, it will look like this.
Wedding Services Section
Wedding Services Settings
Important Step:- Wedding Planning Services Pro Posttype plugin is necessary for creating a Experts for sections.
Fetch Wedding Services
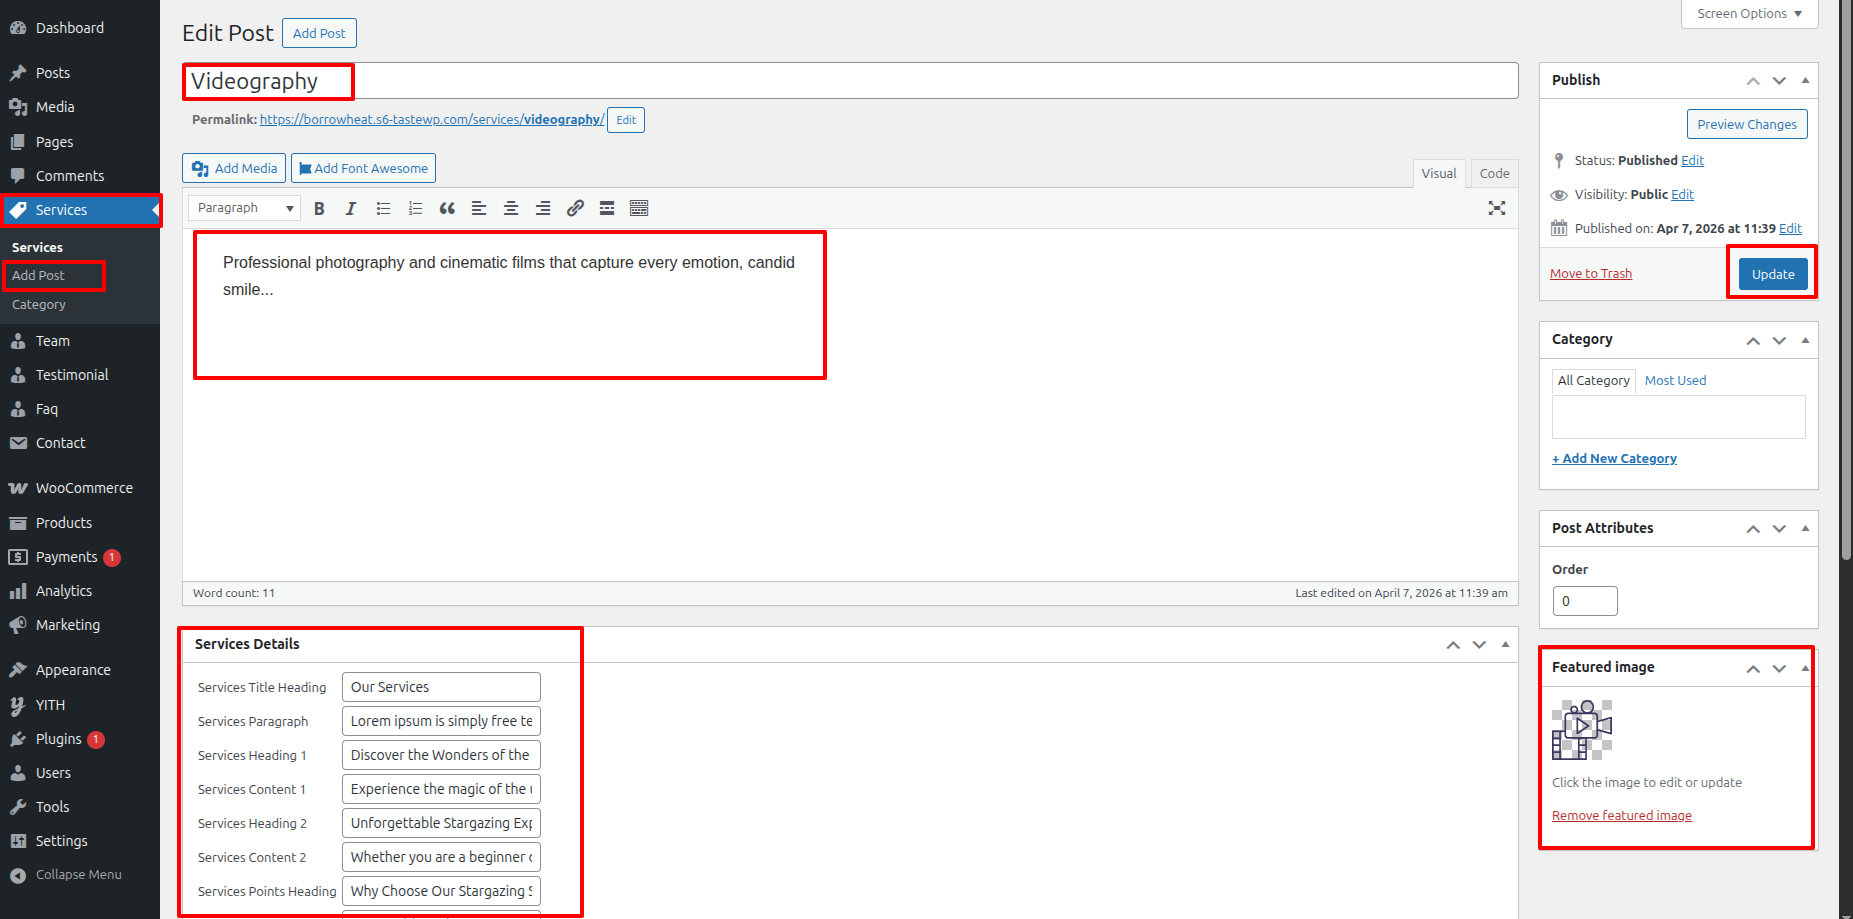
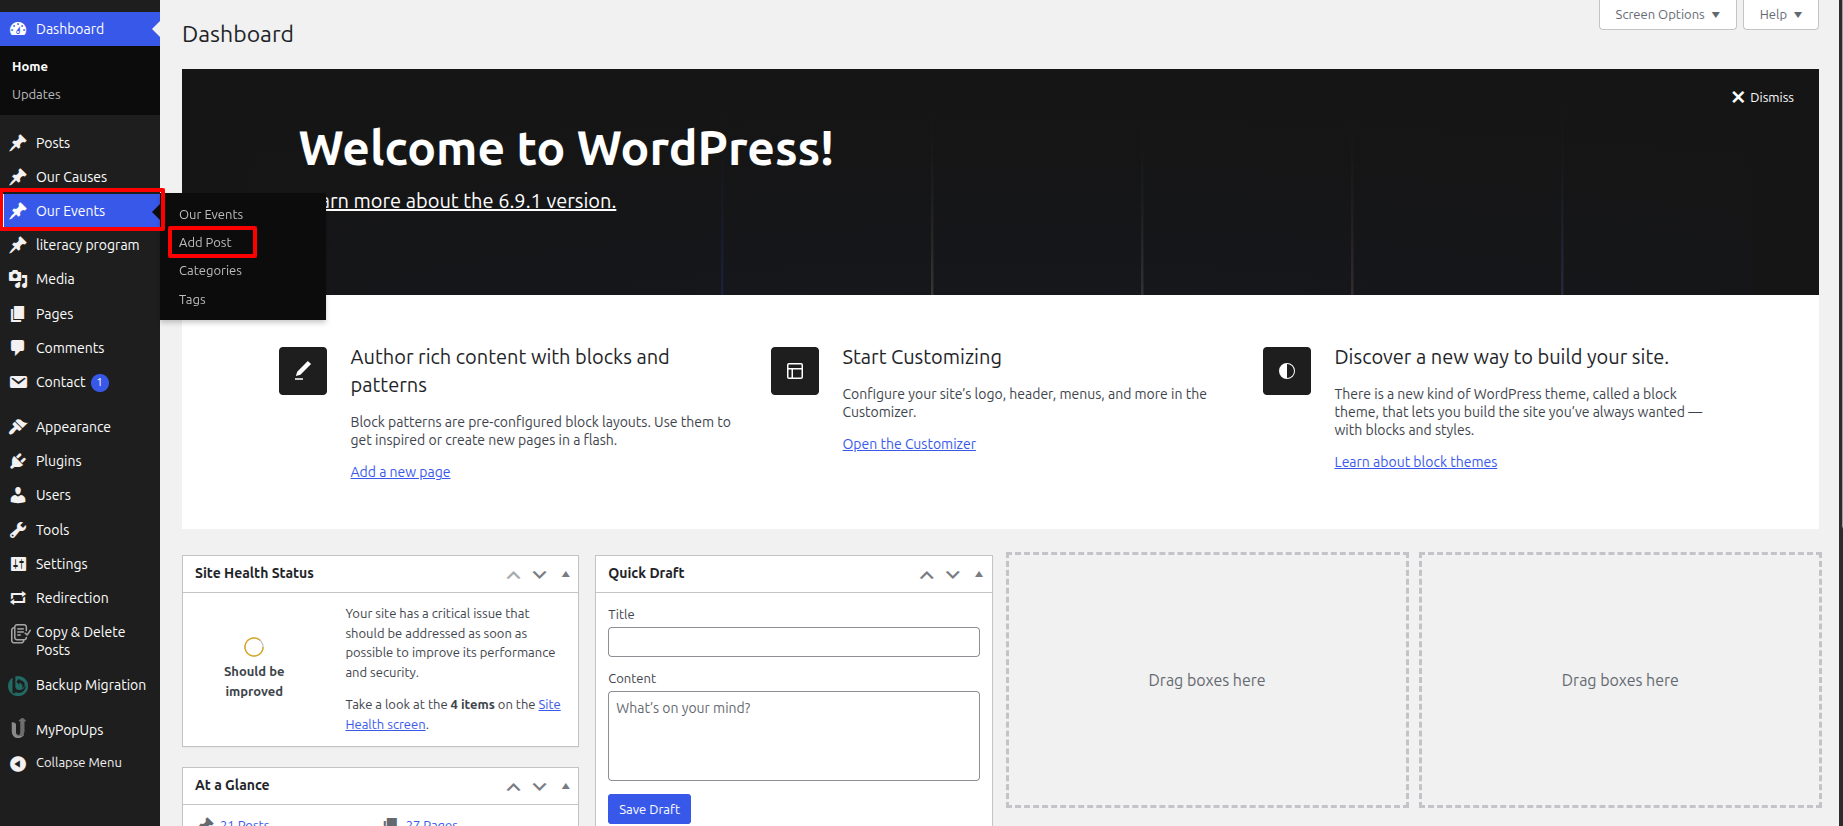
In the Dashboard, go to Services >> Add New Posts
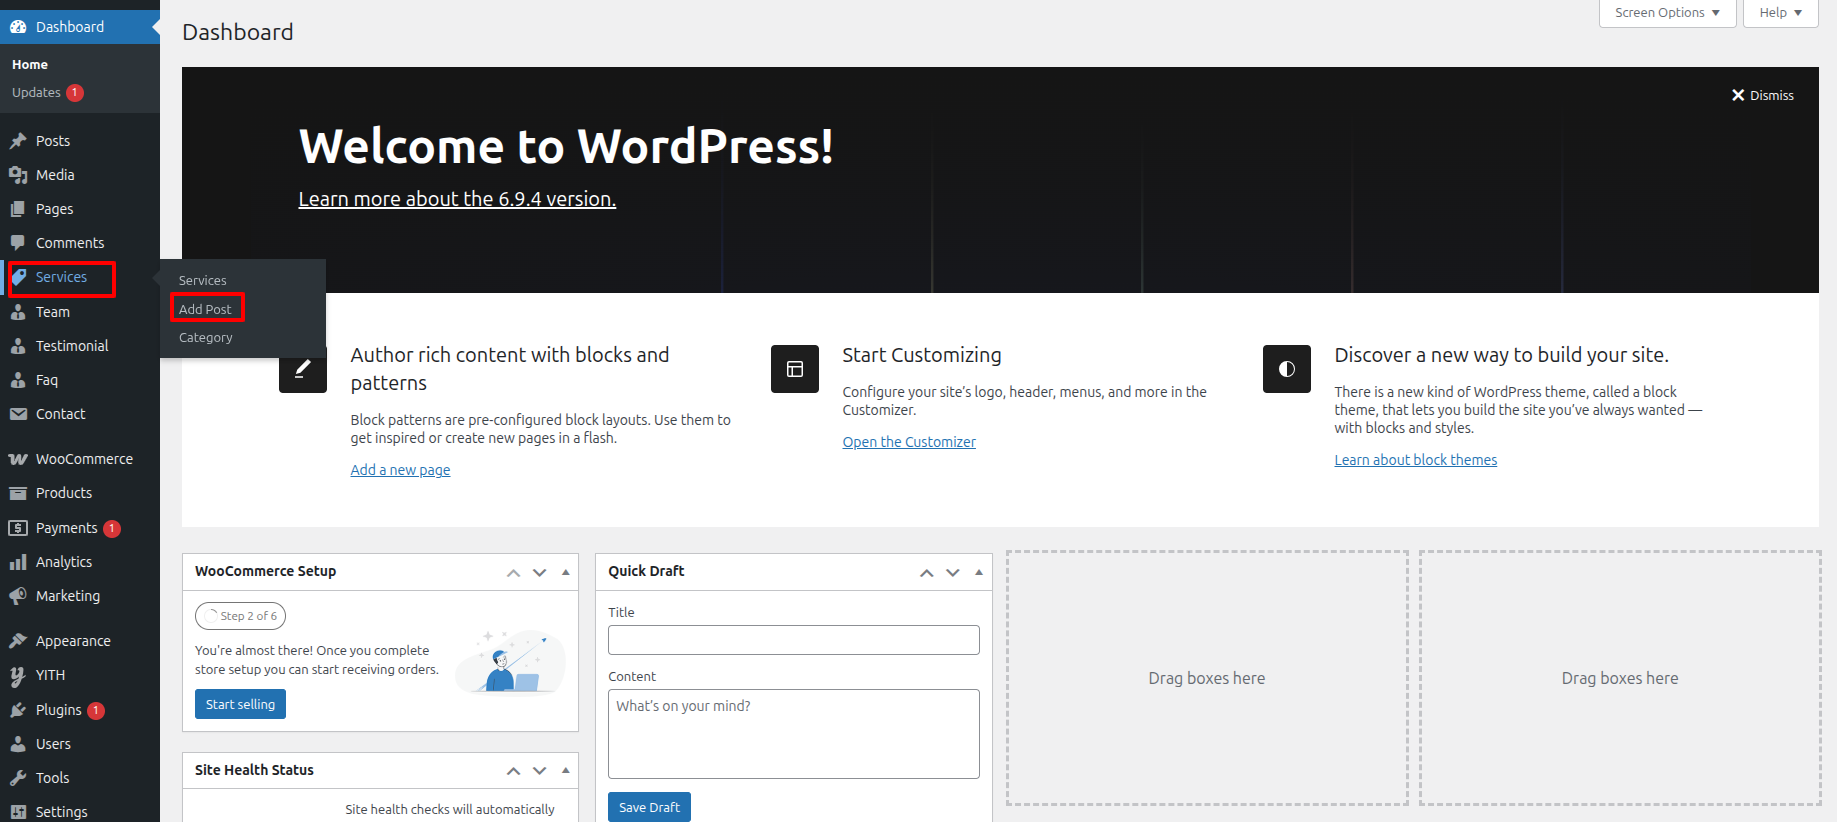
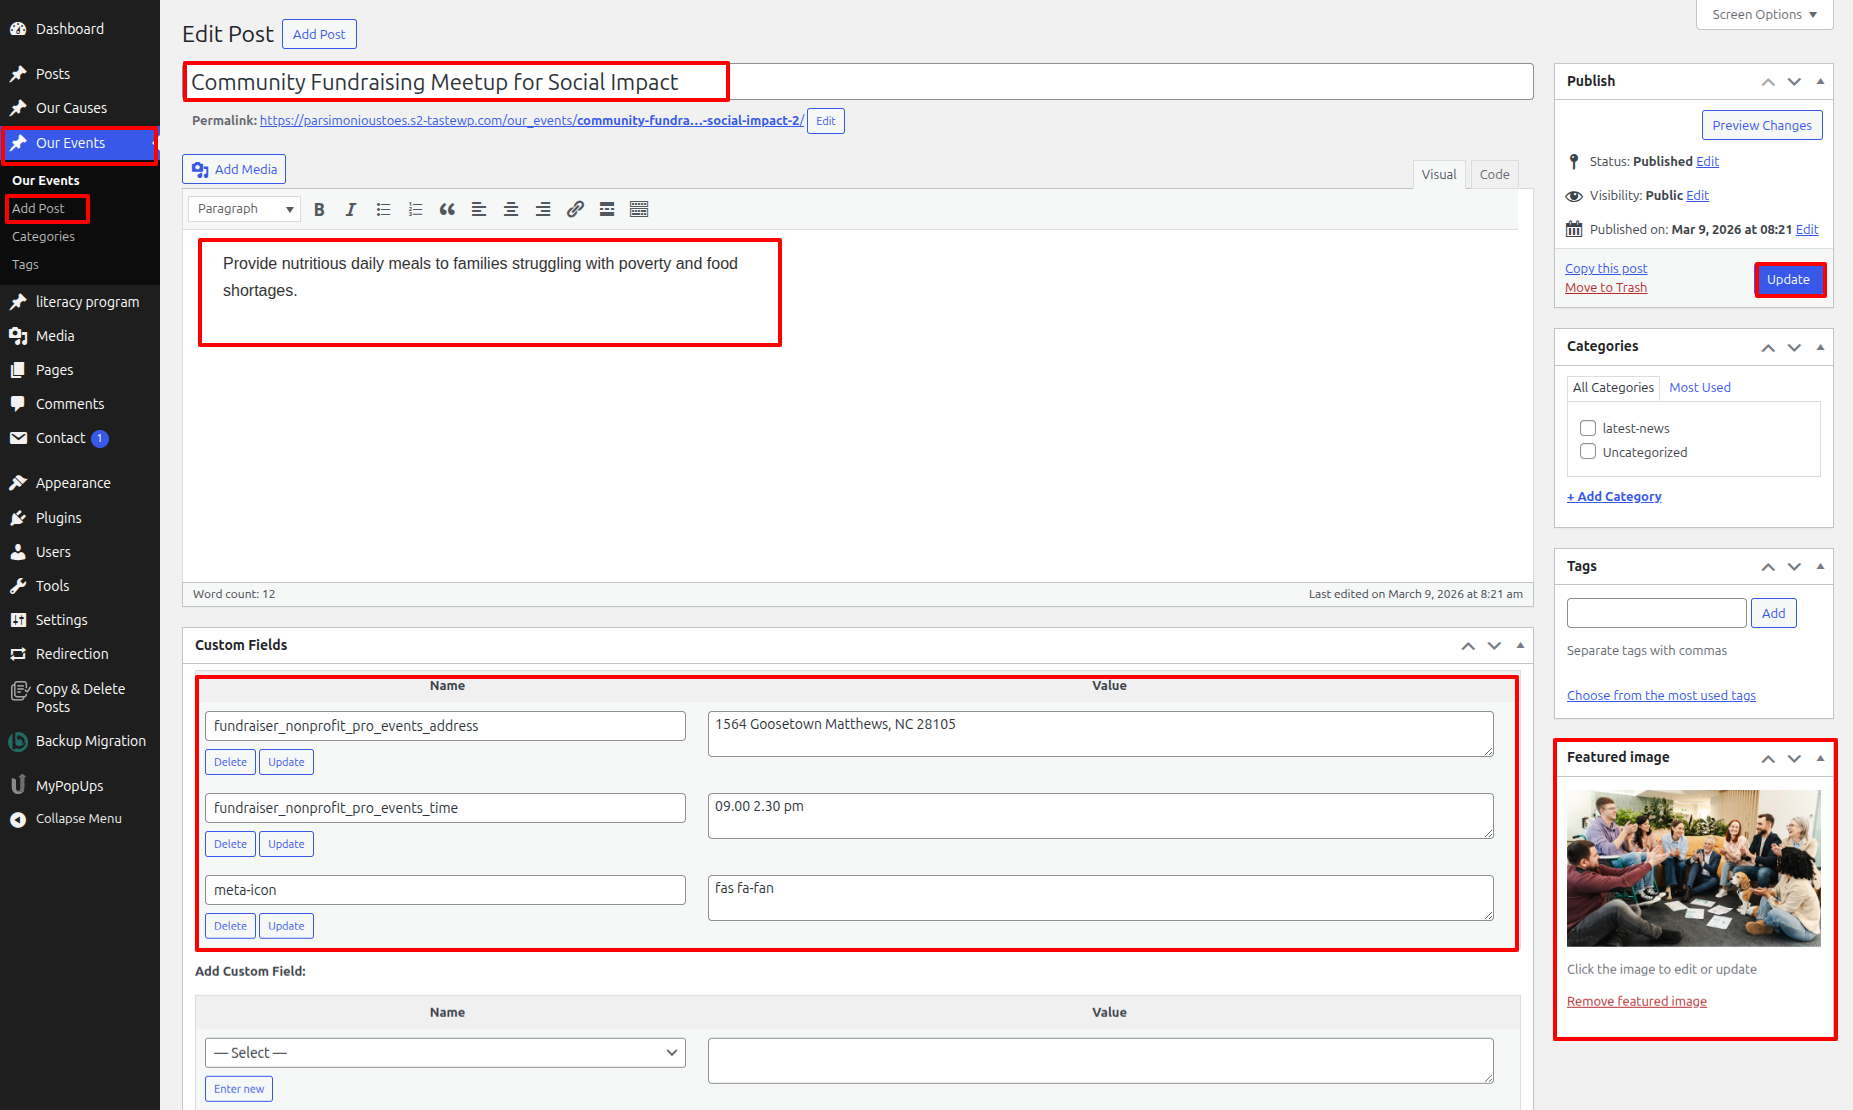
To proceed with Services, you should first choose the Services title, content, and featured image choose the category in which you want Services to appear.
Follow the instructions given below to setup Services.
In the Dashboard, go to Services >> Add New Posts
Once you have done with this you will see the Services on your front page.
In order to proceed with Wedding Services Settings follow the instructions given below.
In the Dashboard, go to Appearance >> Customize >> Theme Settings >> Wedding Services Section >> Text Settings
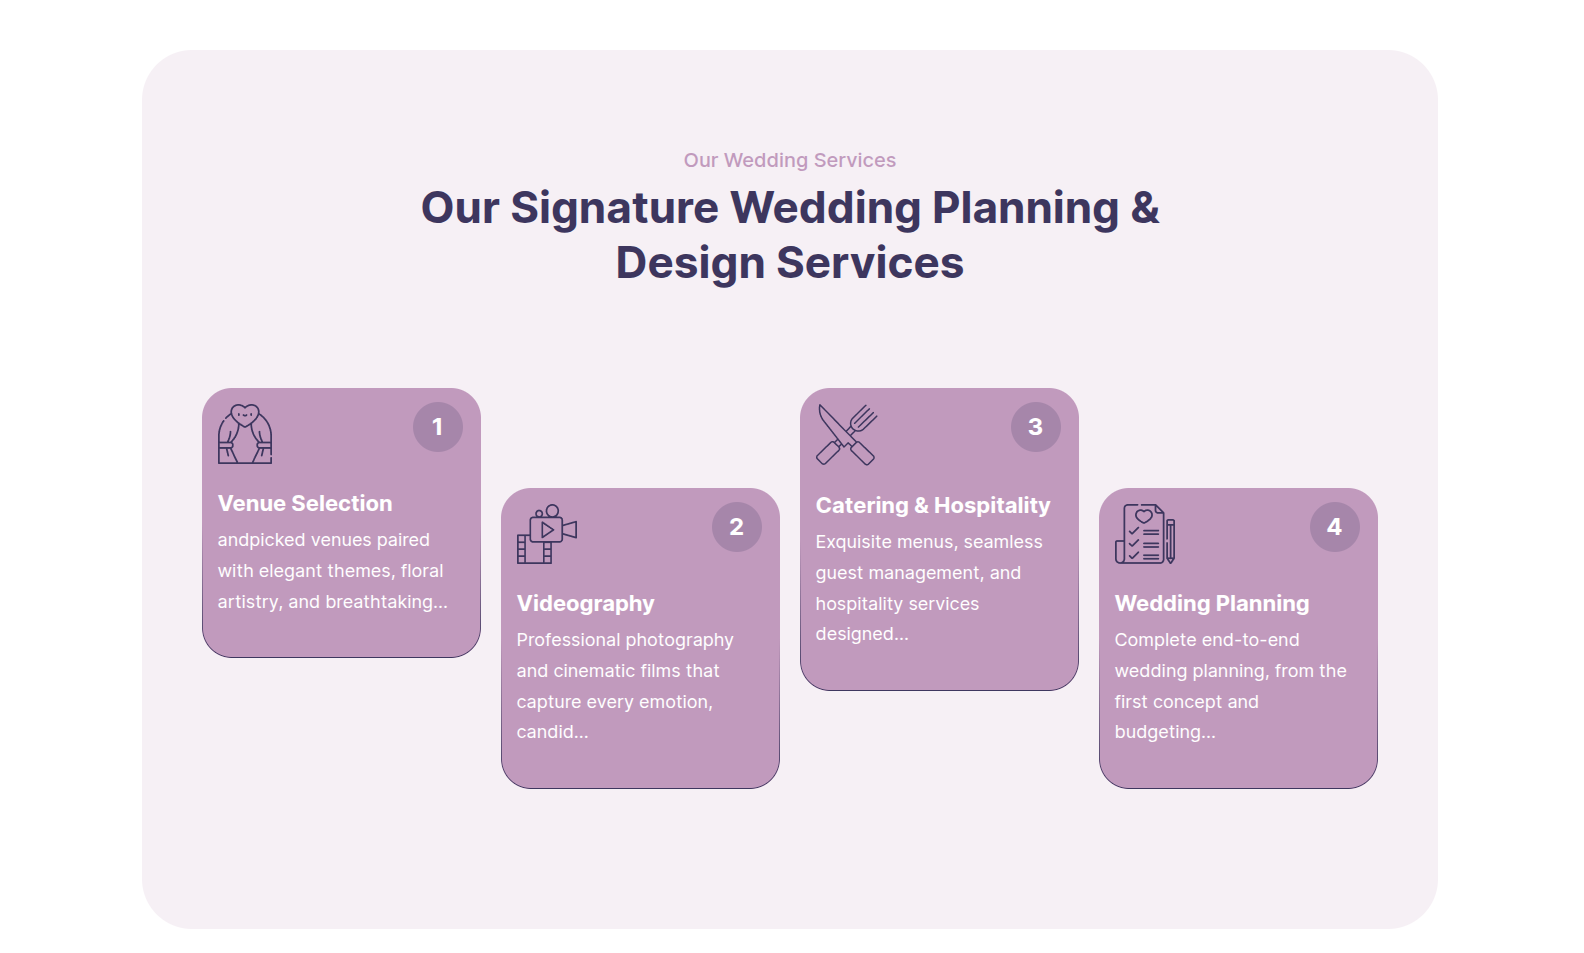
You can set heading and content for section.
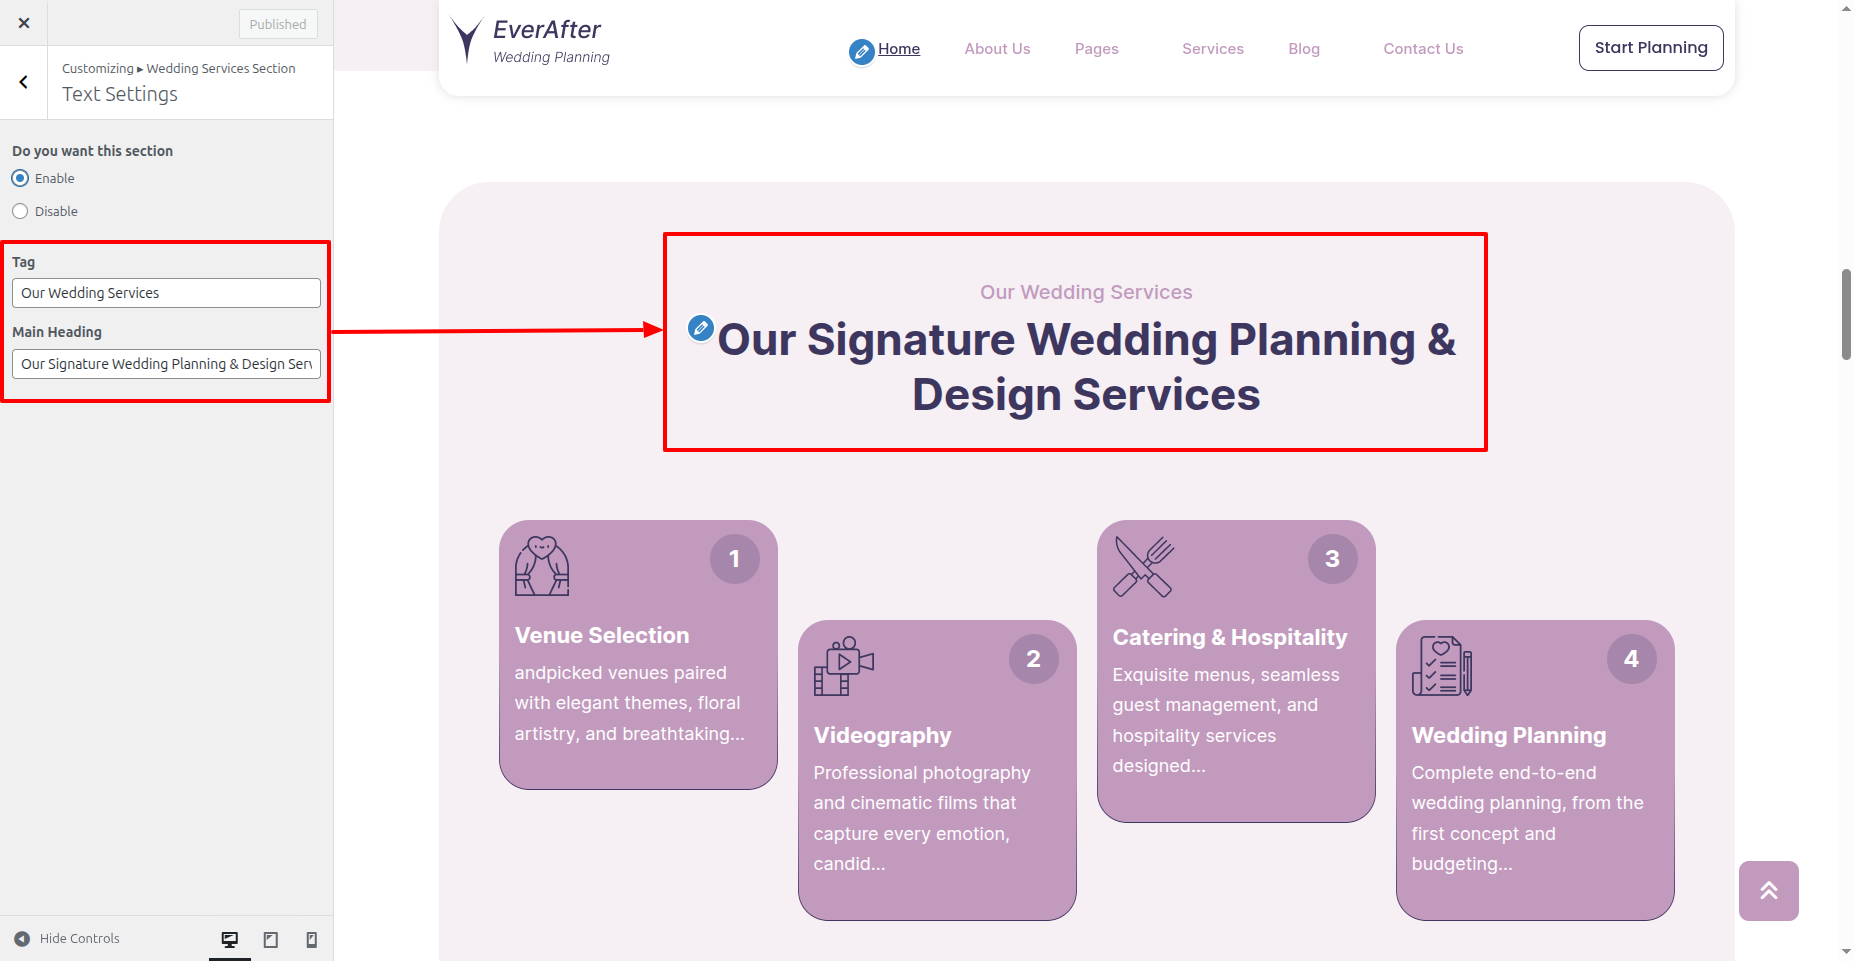
In front end, it will look like this.
Featured Research Section
Featured Research Settings
Important Step:- Wedding Planning Services Pro Posttype plugin is necessary for creating a Experts for sections.
Fetch Map
In the Dashboard, go to Featured Research >> Add New Posts
To proceed with Featured Research, you should first choose the Featured Research title, content, and featured image choose the category in which you want Featured Research to appear.
Follow the instructions given below to setup Featured Research.
In the Dashboard, go to Featured Research >> Add New Posts
Once you have done with this you will see the Featured Research on your front page.
In order to proceed with Featured Research Settings follow the instructions given below.
In the Dashboard, go to Appearance >> Customize >> Theme Settings >> Featured Research Section >> Text Settings
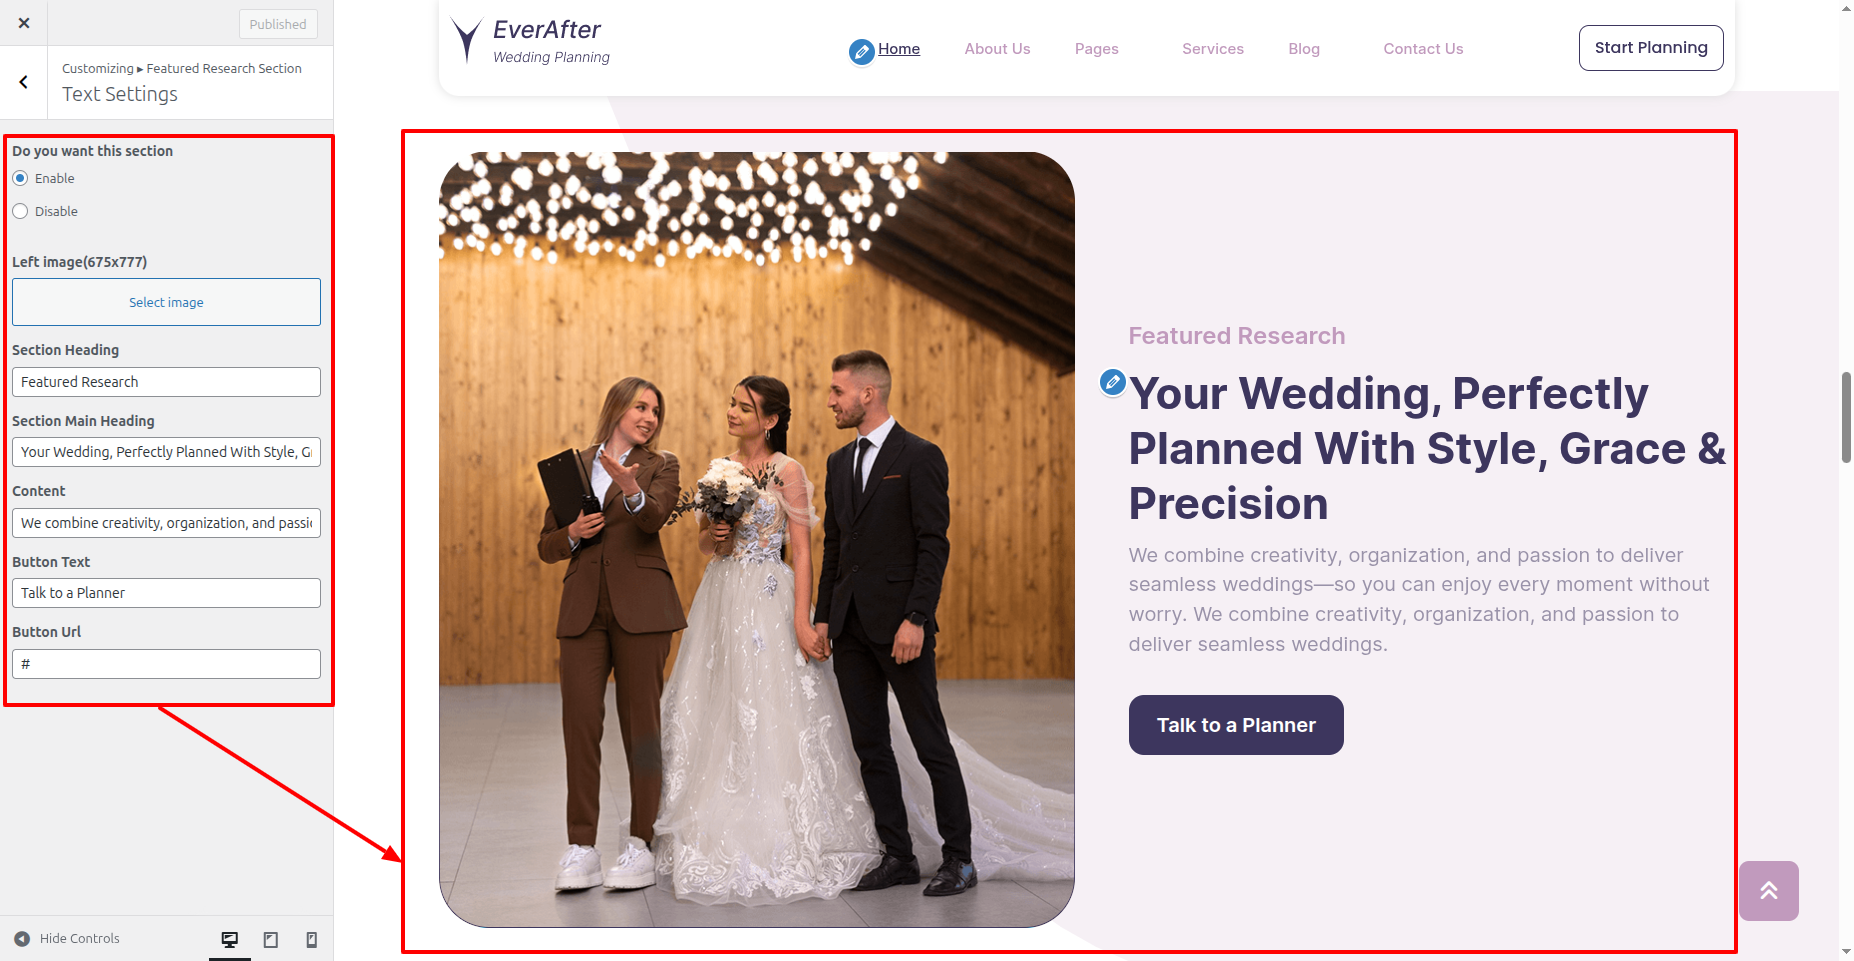
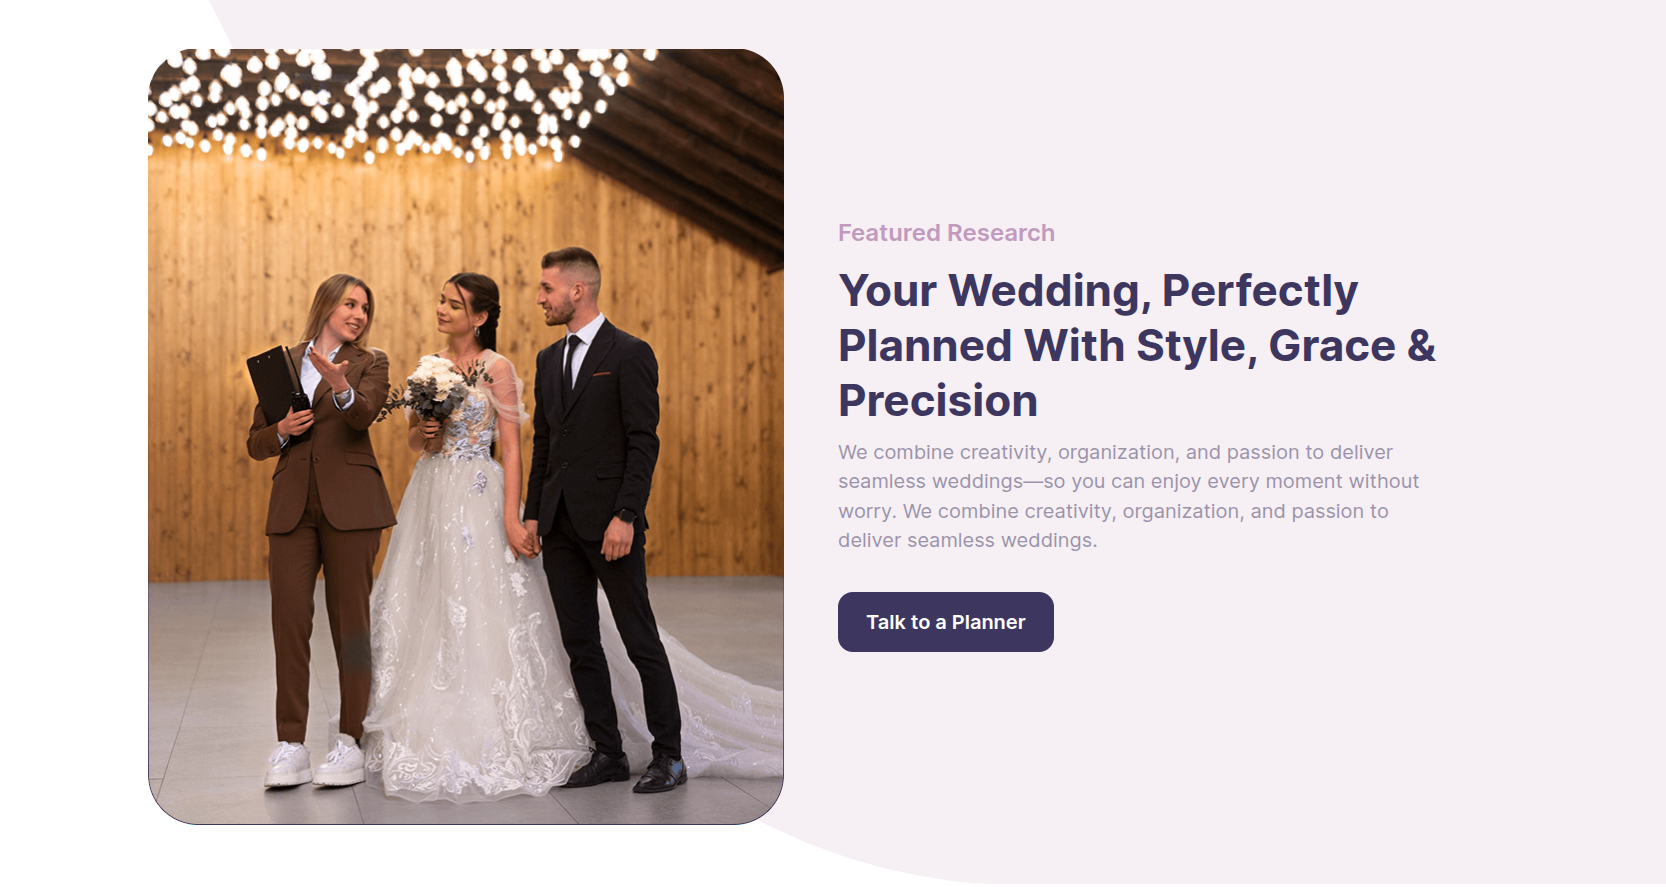
In front end, it will look like this.
Join Us Section
Join Us Settings
Fetch Posts
In order to proceed with Theme Join Us Settings , follow the instructions given below.
In the Dashboard, go to Appearance >> Customize >> Theme Settings >> Join Us Section >> Text Settings
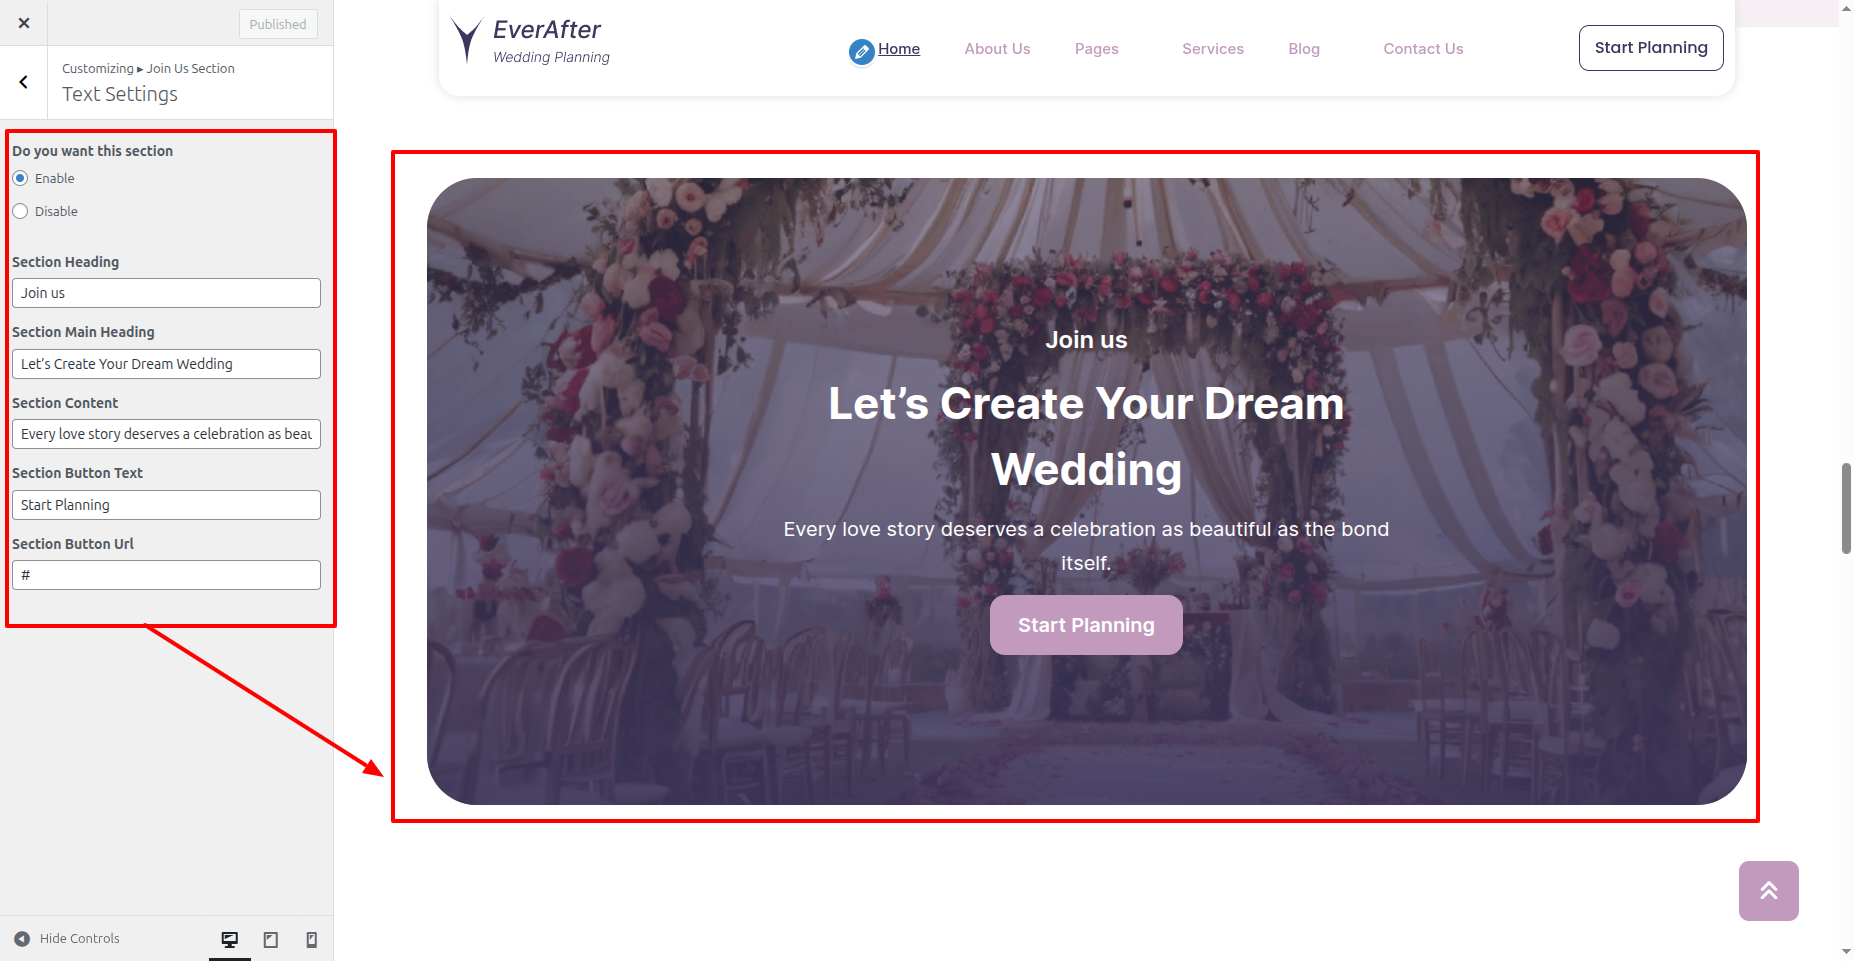
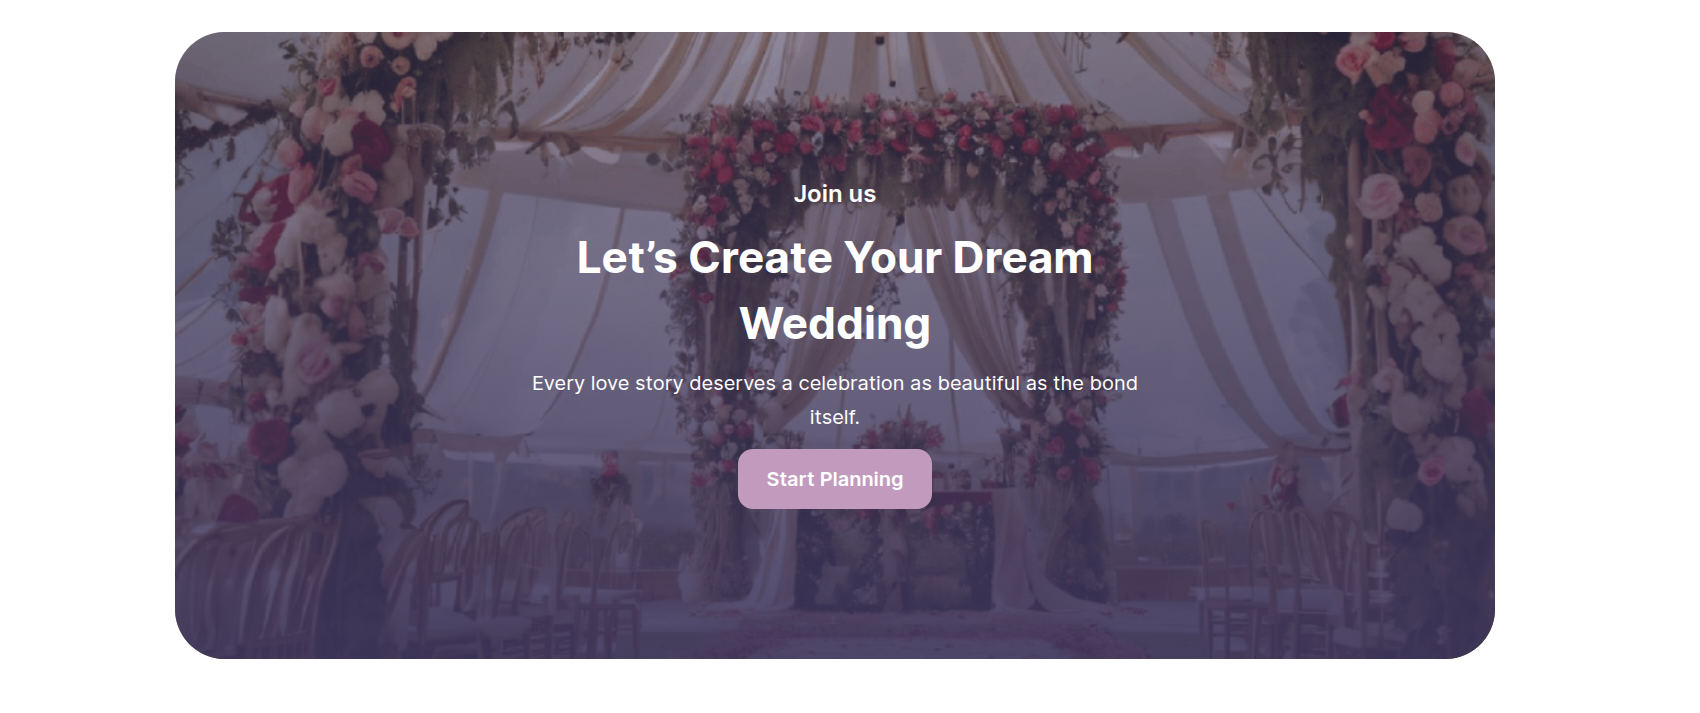
In front end, it will look like this.
Our Gallery Section
Our Gallery Settings
In order to proceed with Our Gallery Settings follow the instructions given below.
In the Dashboard, go to Appearance >> Customize >> Theme Settings >> Our Gallery Section >> Text Settings
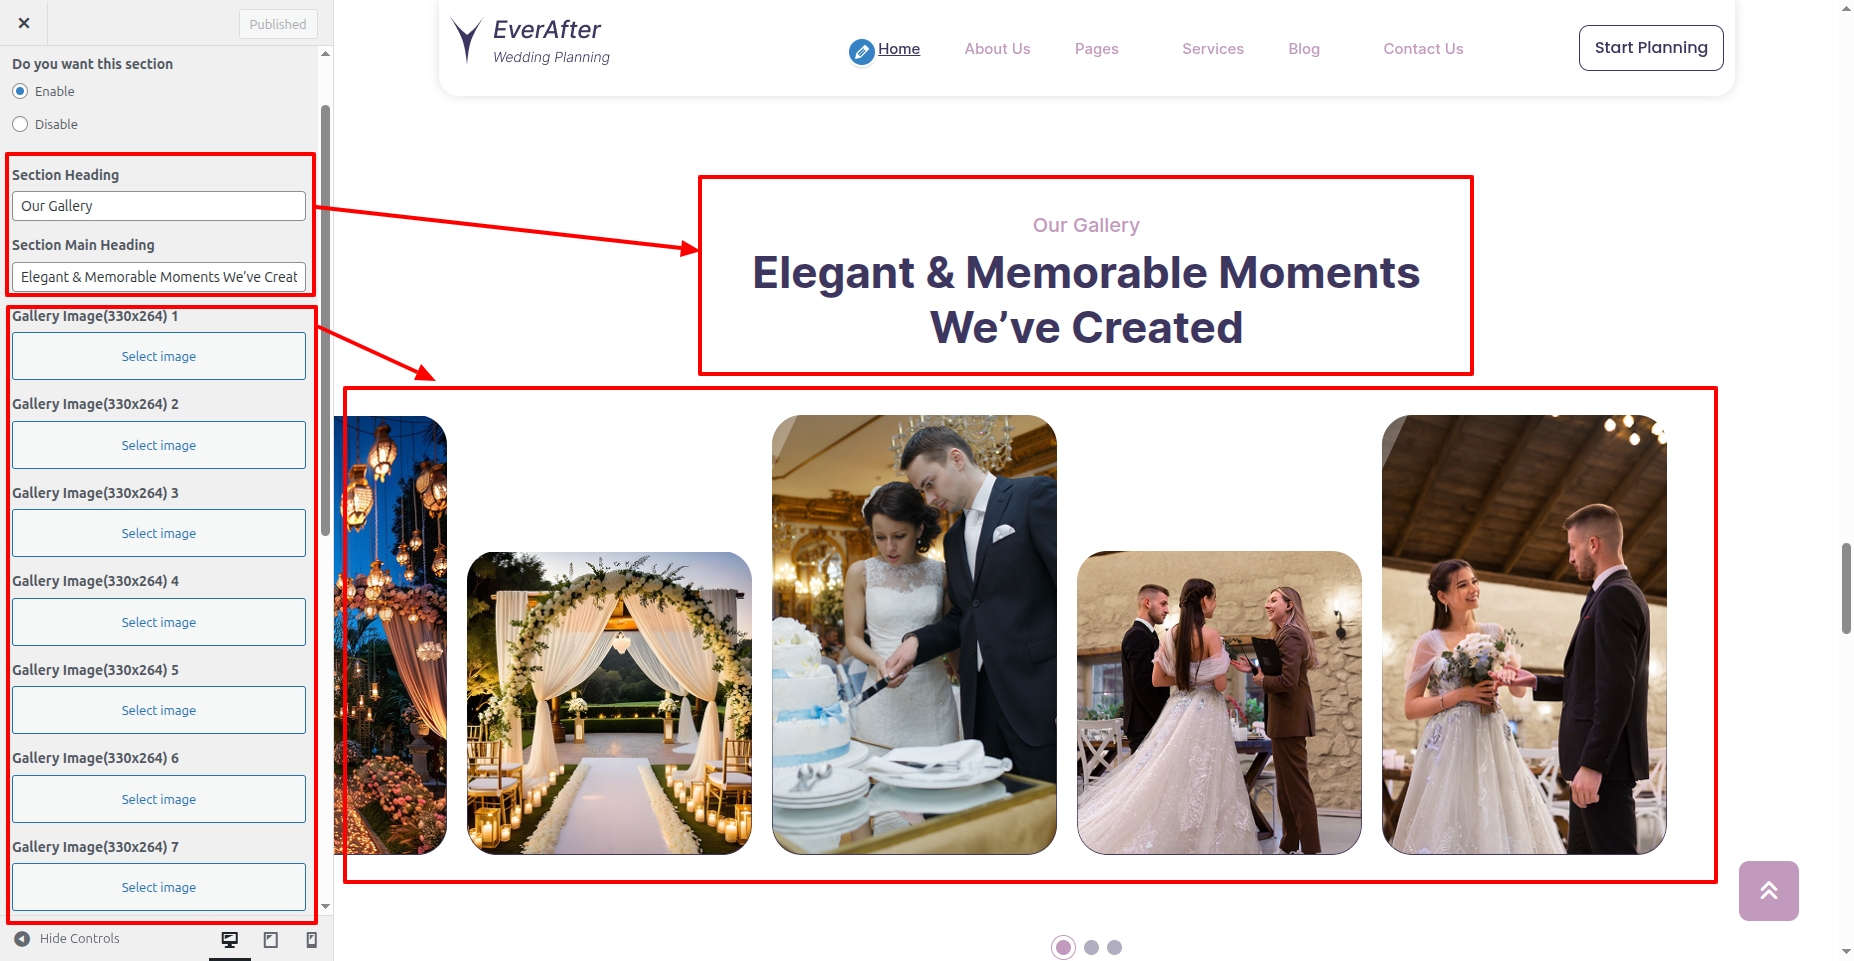
In front end, it will look like this.

Testimonial Section
Testimonial Settings
Important Step:- Wedding Planning Services Pro Posttype plugin is necessary for creating a Testimonial for sections.
Fetch Testimonial
In the Dashboard, go to Testimonial >> Add New Post
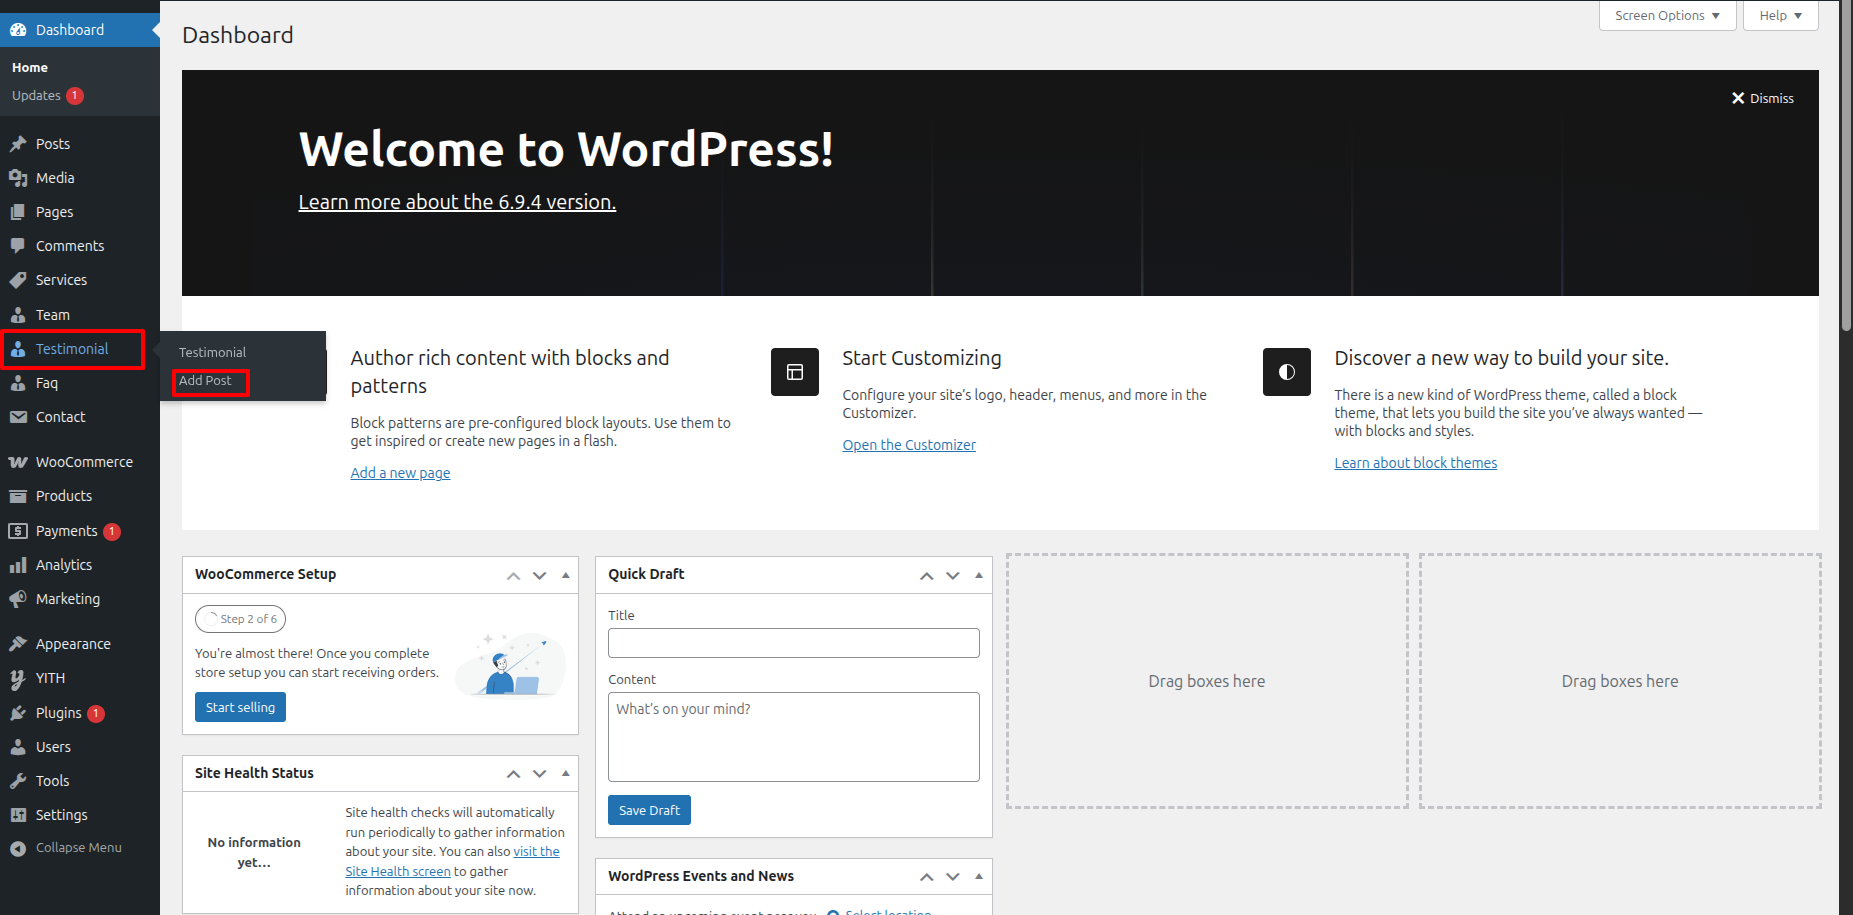
To proceed with Testimonial, you should first choose the Testimonial title, content, and featured image choose the category in which you want Testimonial to appear.
Follow the instructions given below to setup Testimonial.
In the Dashboard, go to Testimonial >> Add New Post
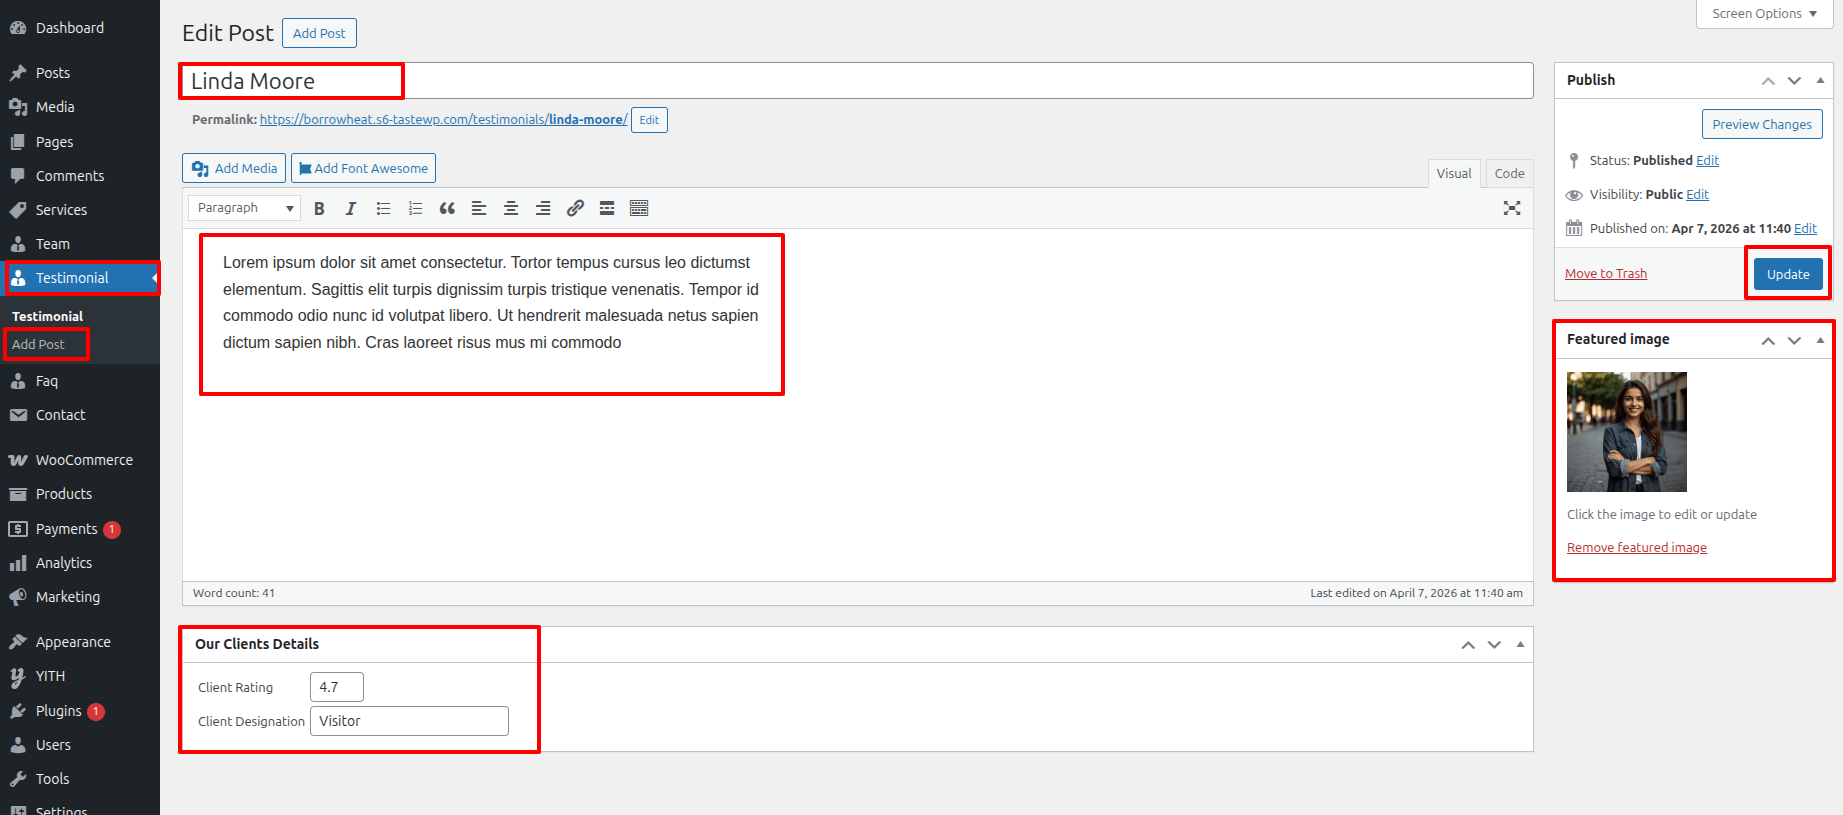
Once you have done with this you will see the Testimonial on your front page.
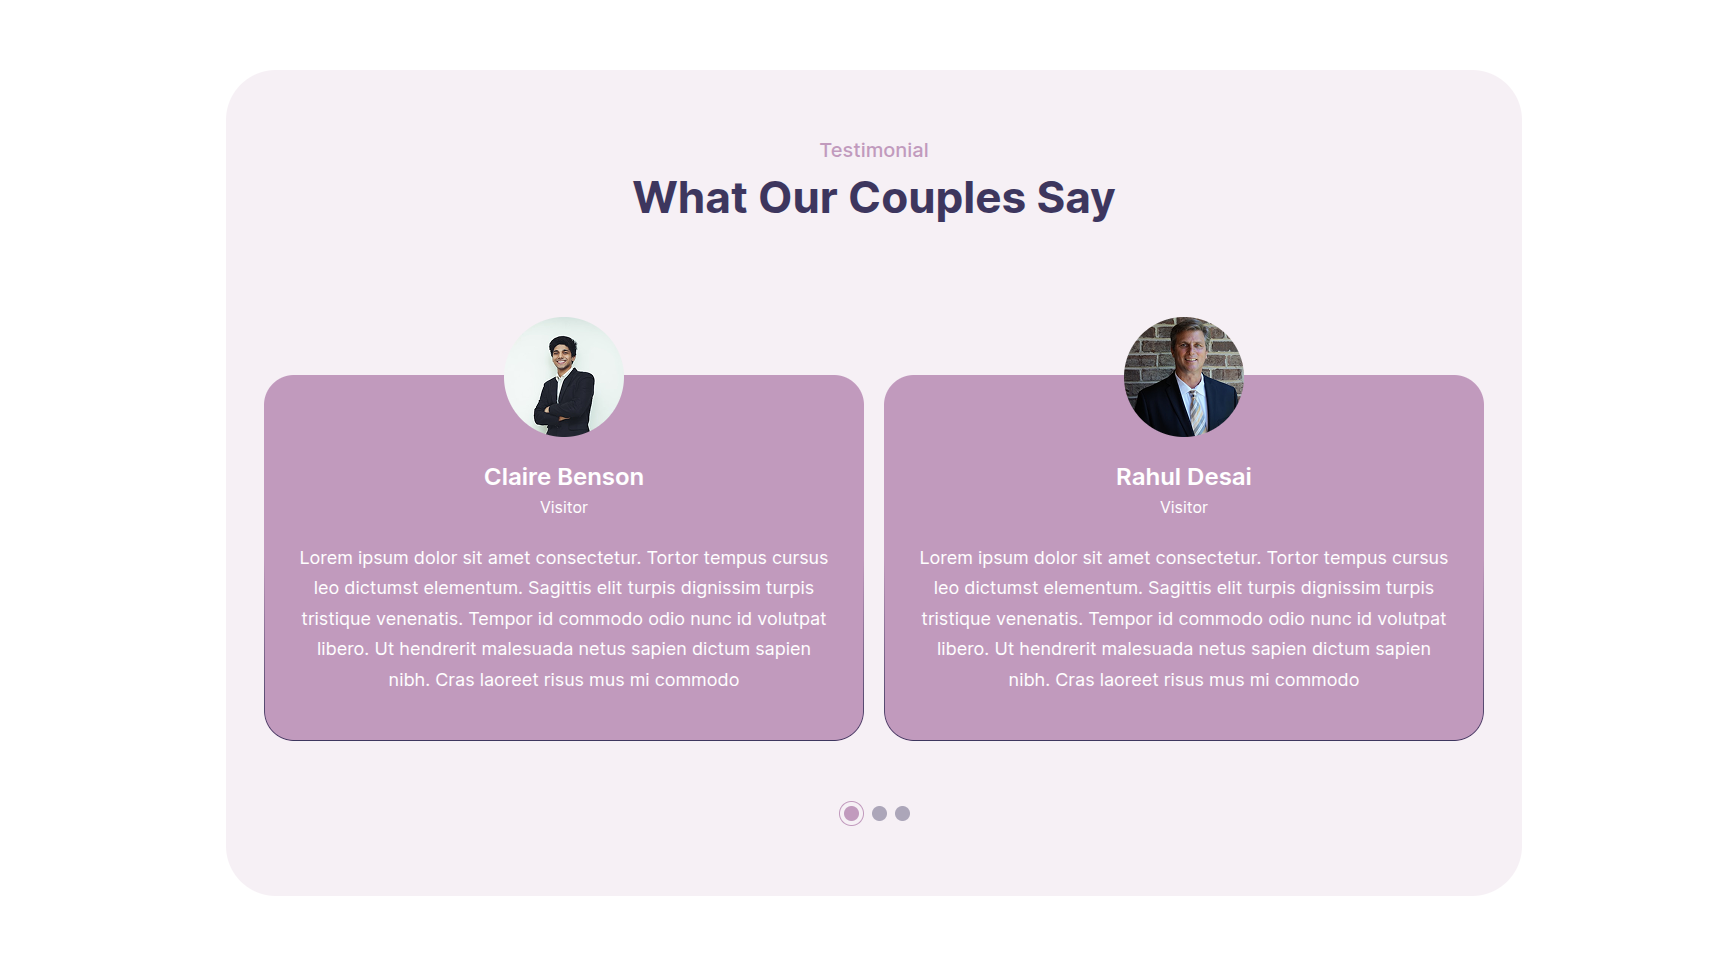
In order to proceed with Testimonial Settings follow the instructions given below.
In the Dashboard, go to Appearance >> Customize >> Theme Settings >> Testimonial Section >> Text Settings
You can choose from this options for each Testimonial settings.
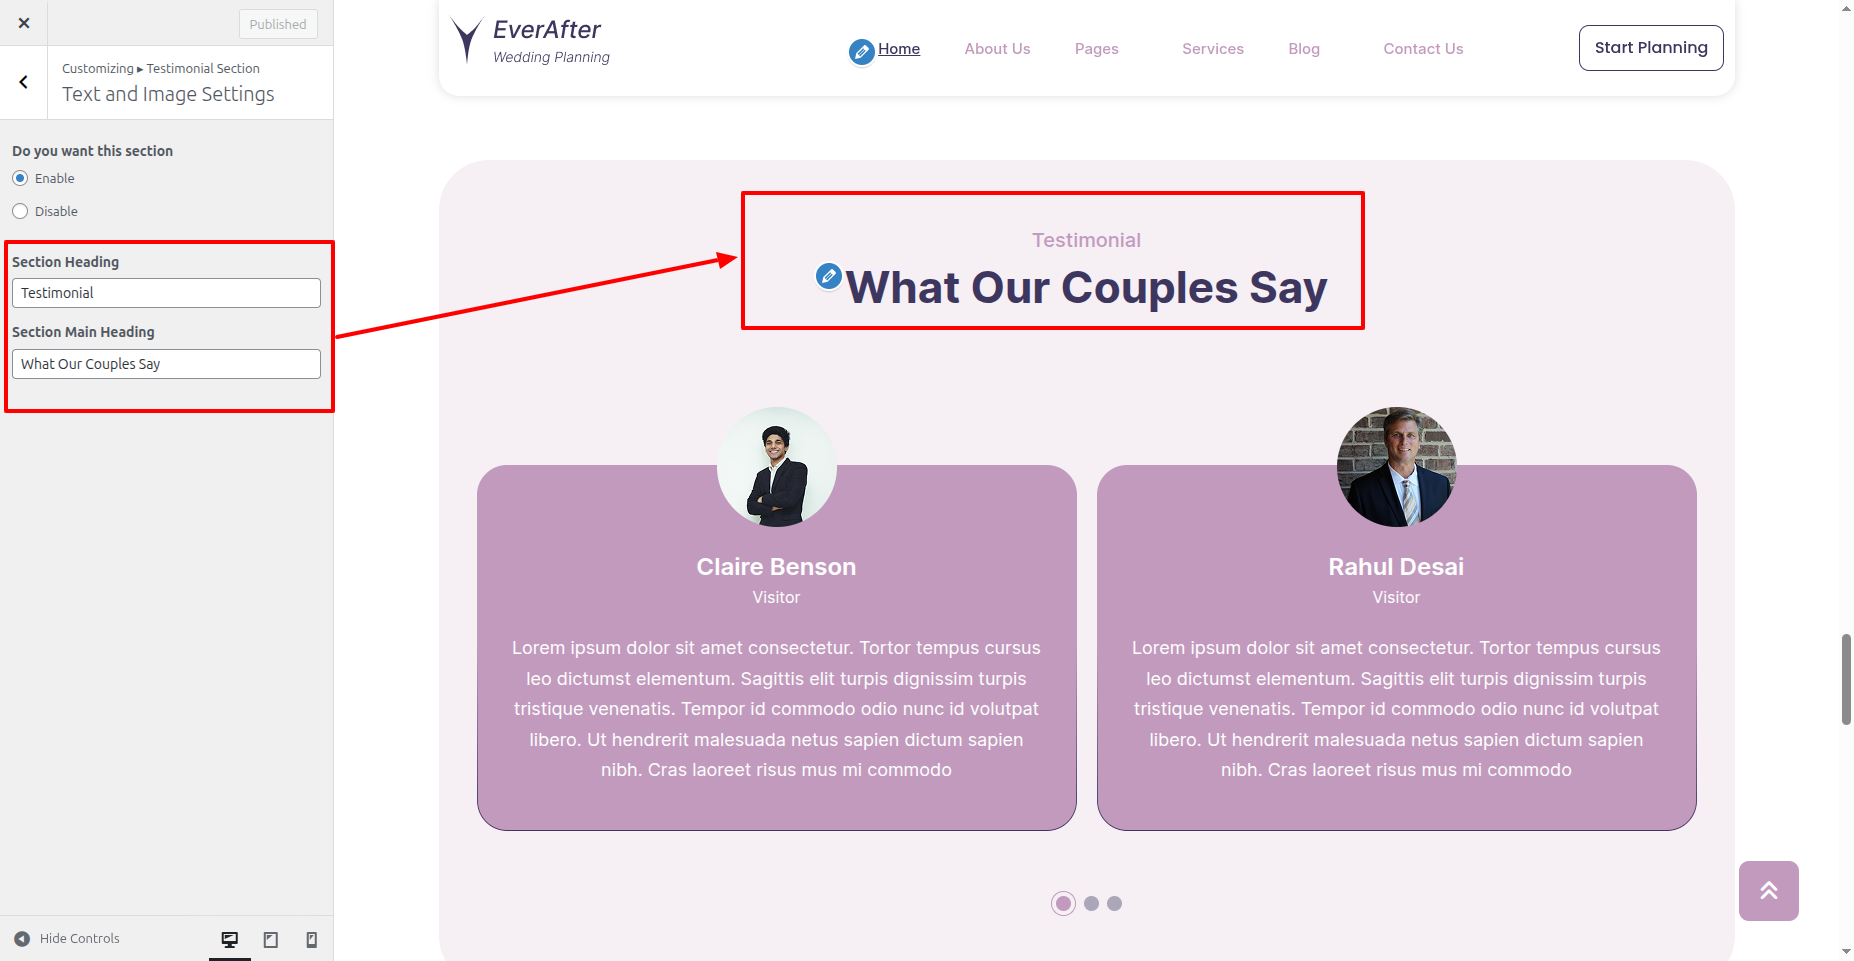
In front end, it will look like this.
Our Blog Section
Our Blog Settings
In the Dashboard, go to Posts >> Add New Posts
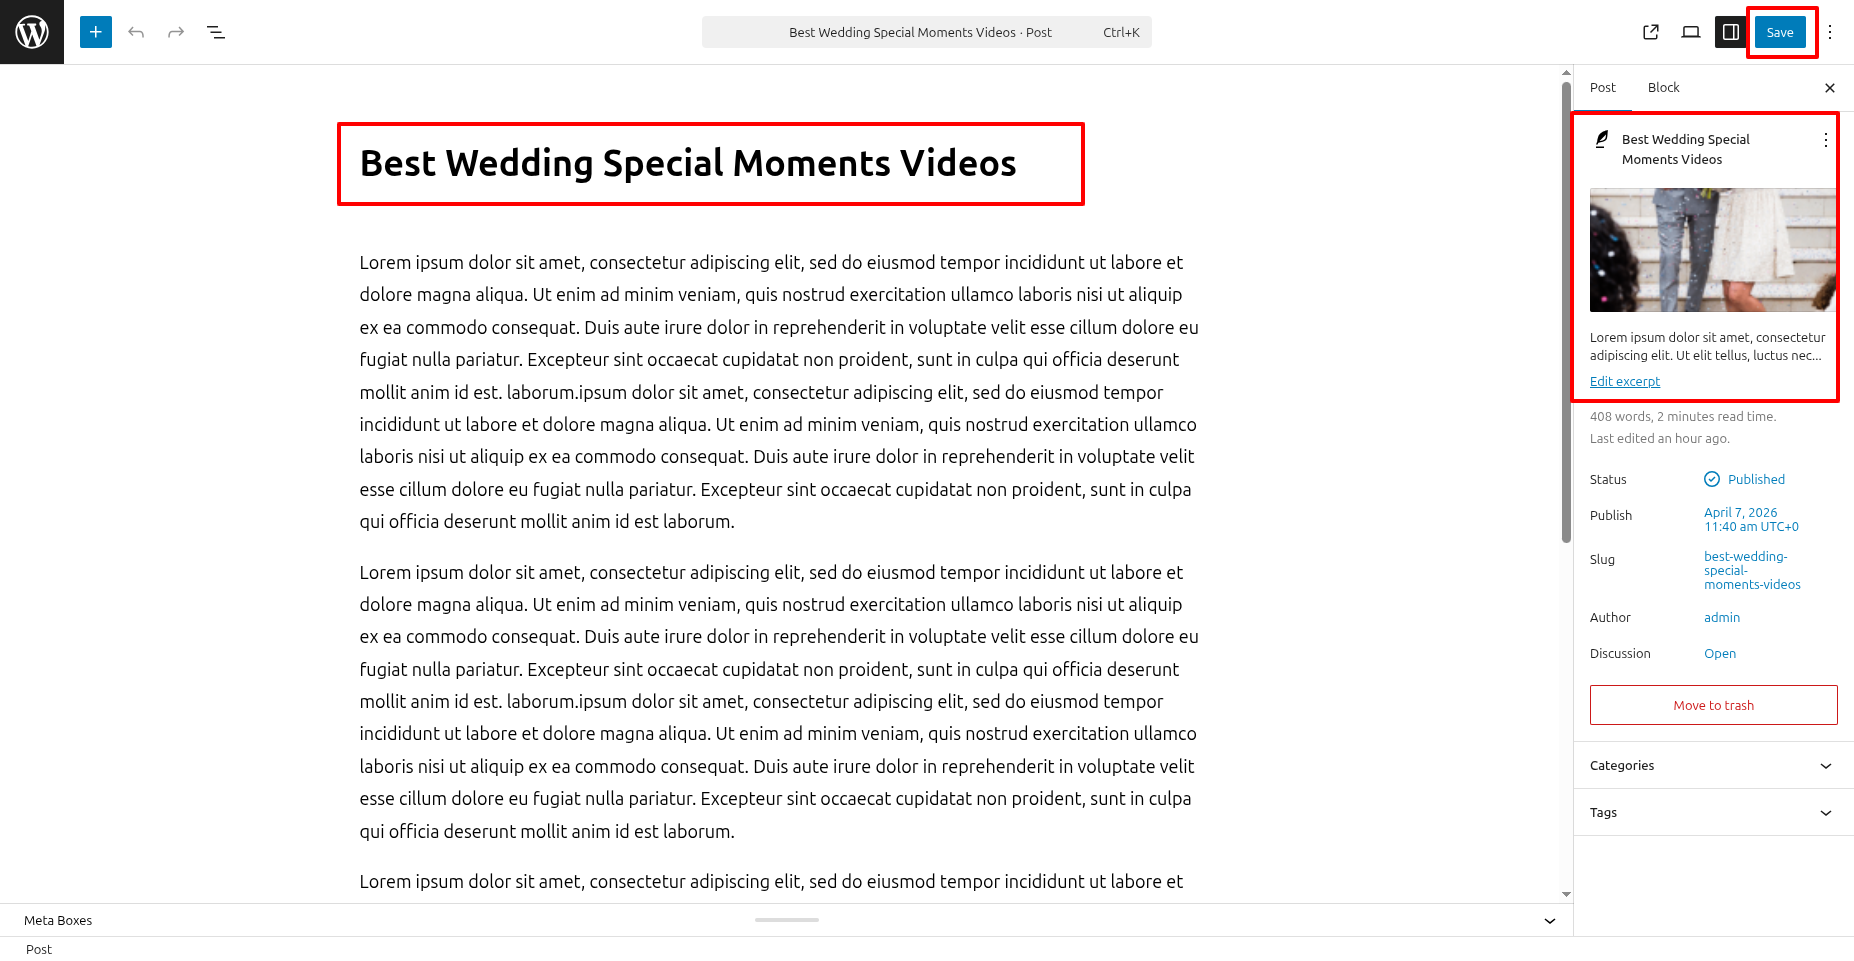
In order to proceed with Our Blog Settings follow the instructions given below.
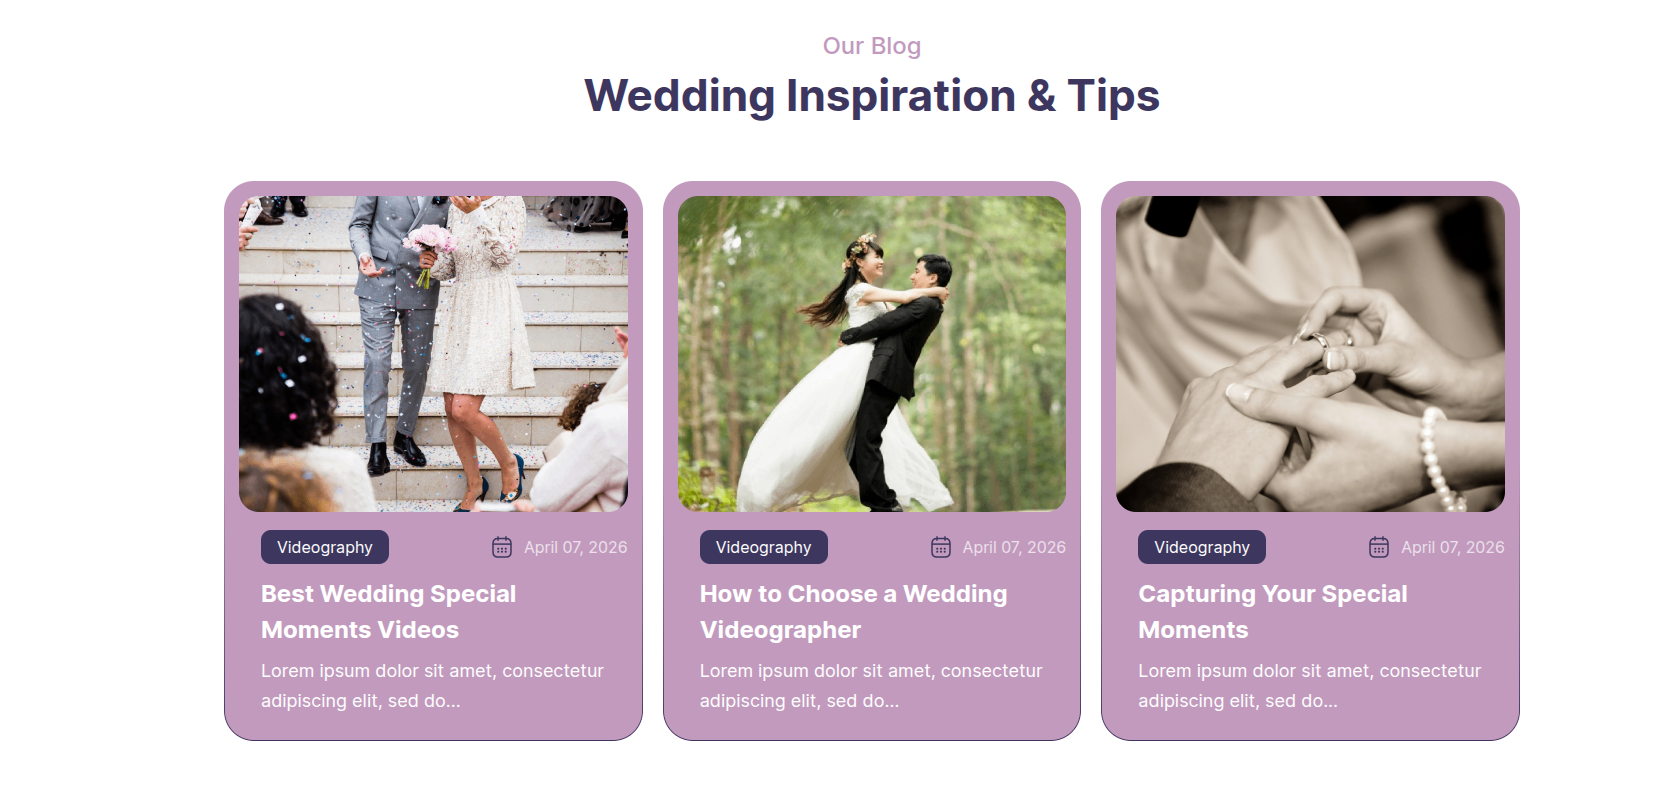
In the Dashboard, go to Appearance >> Customize >> Theme Settings >> Our Blog Section >> Text and Image Settings
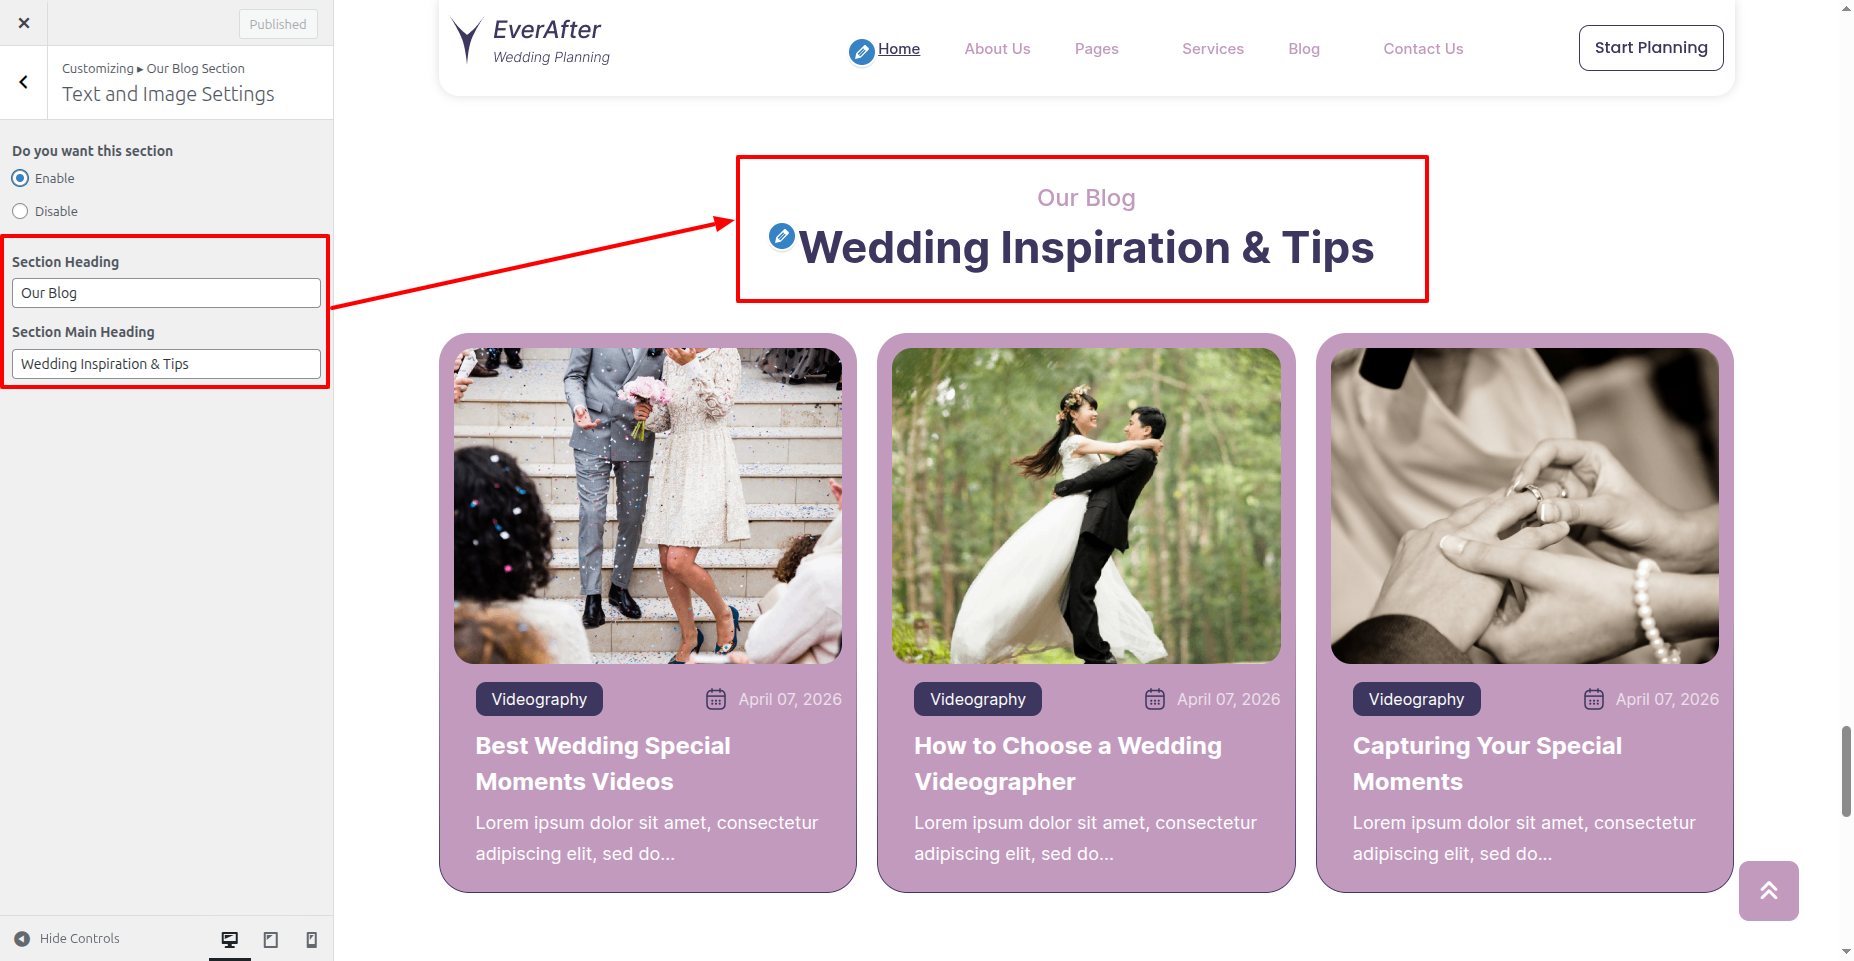
In front end, it will look like this.
Contact US Section
Contact US Settings
Important Step:- Contact Form 7 plugin is necessary for creating a Experts for sections.
Fetch Wedding Contact
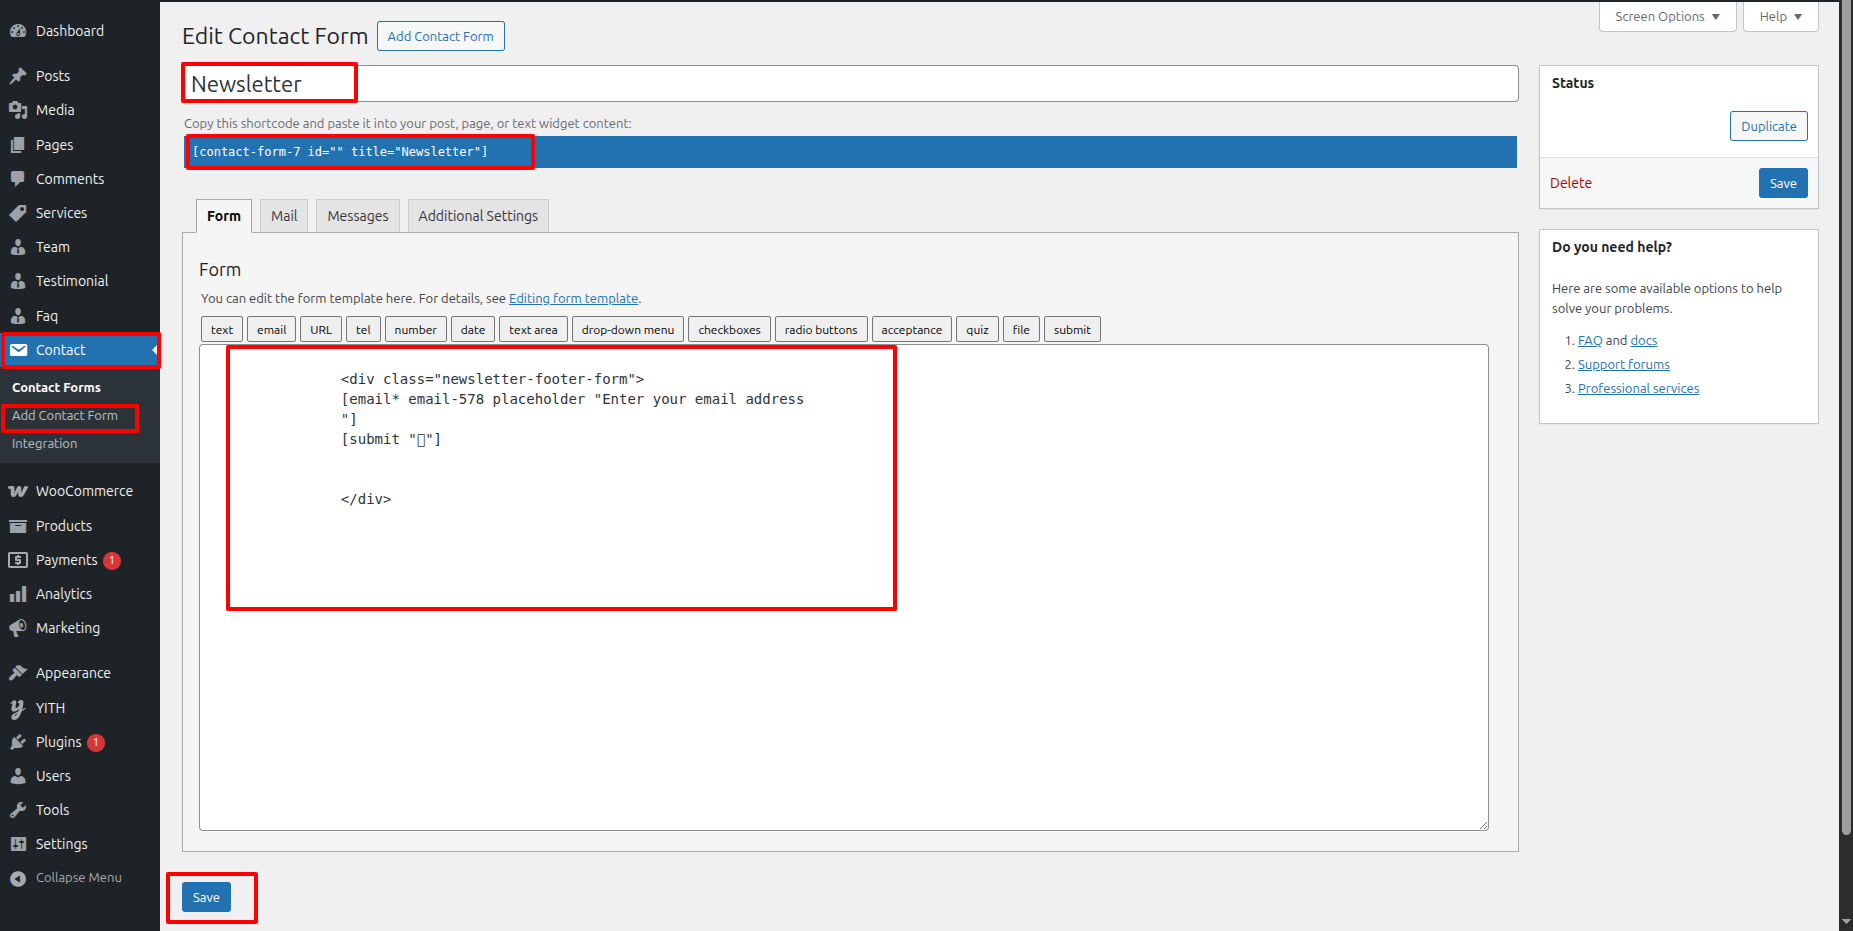
In the Dashboard, go to Contact >> Contact Form
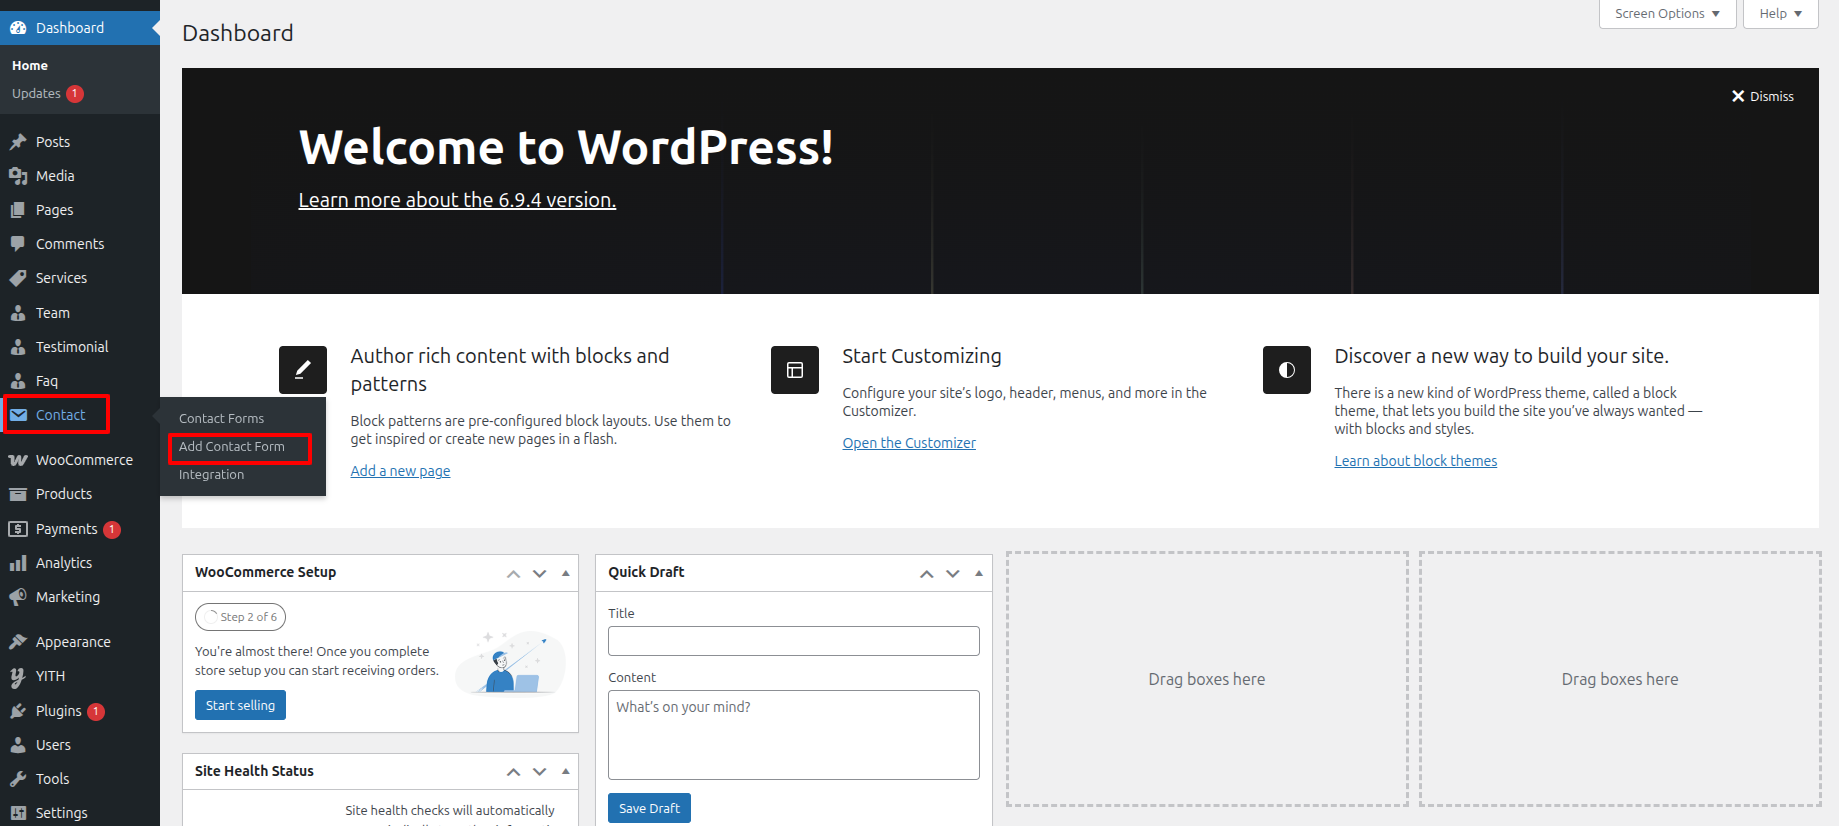
To proceed with Contact, you should first choose the Contact title, content, and featured image choose the category in which you want Contact to appear.
Follow the instructions given below to setup Contact.
In the Dashboard, go to Contact >> Contact Form
Once you have done with this you will see the Contact on your front page.
In order to proceed with Wedding Contact Settings follow the instructions given below.
In order to proceed with Contact US Settings follow the instructions given below.
In the Dashboard, go to Appearance >> Customize >> Theme Settings >> Contact US Option >> Contact US Settings
You can set heading and content of section. You can set icon also. You can choose from this options for each Contact US settings.
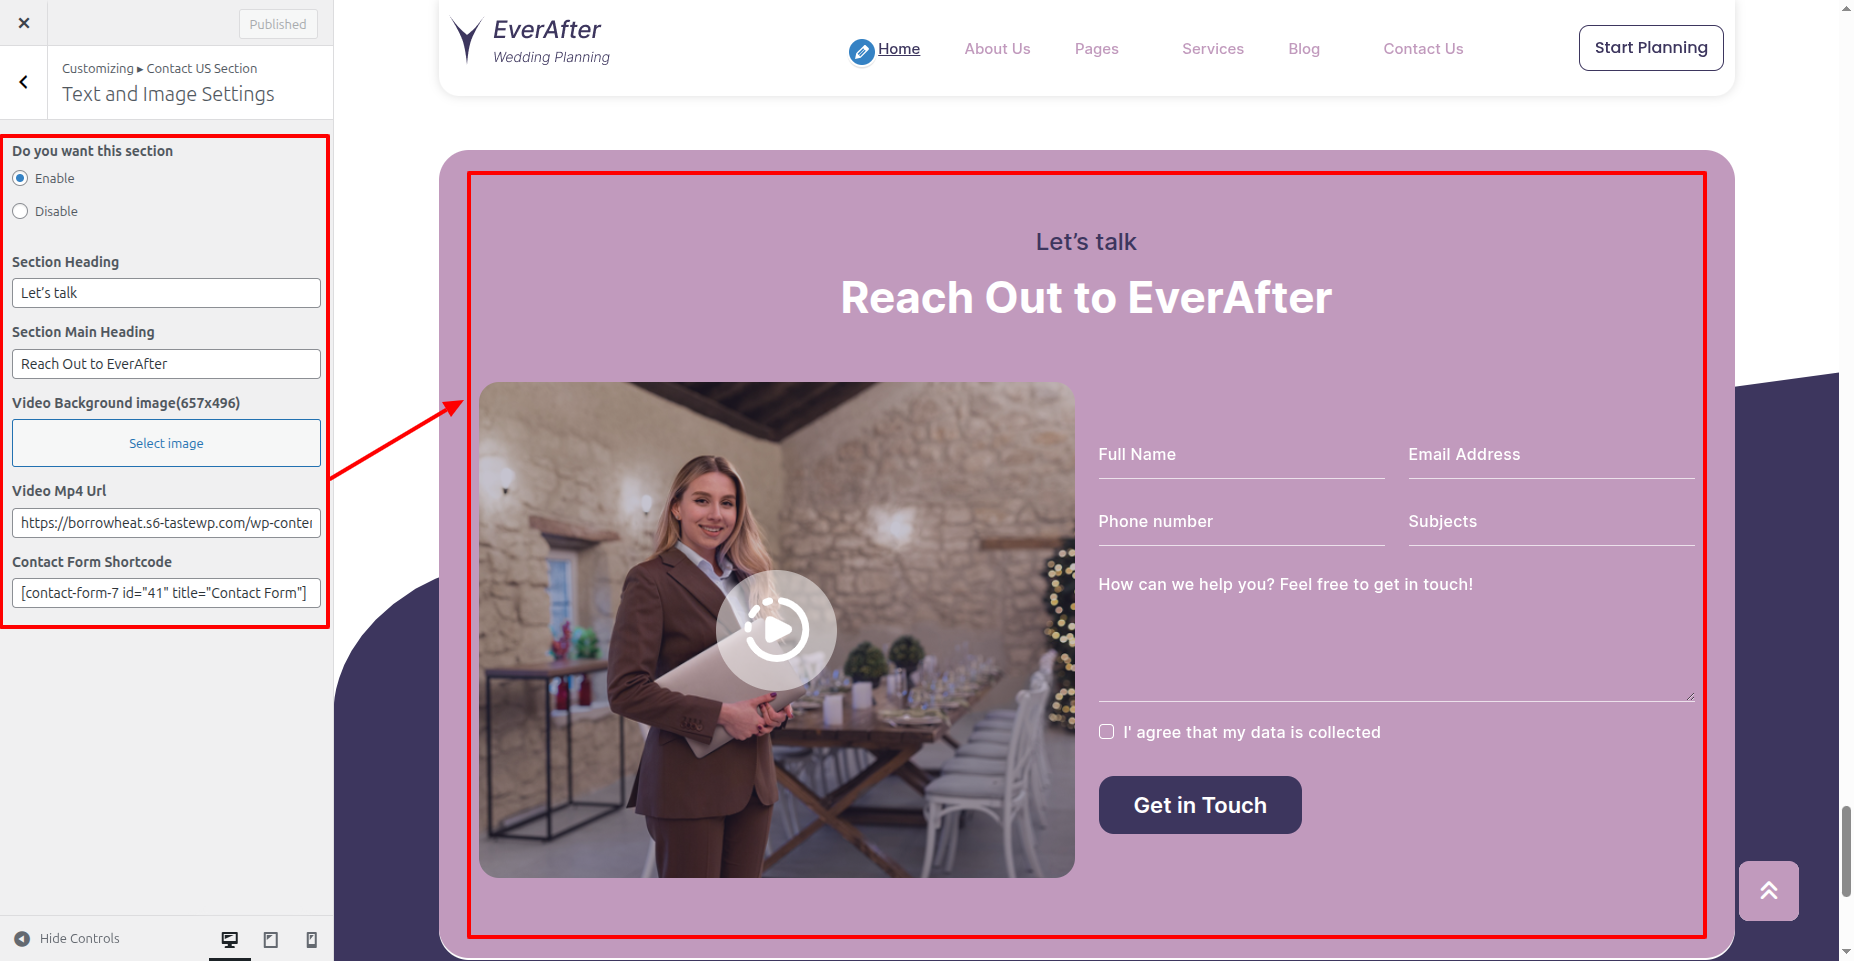
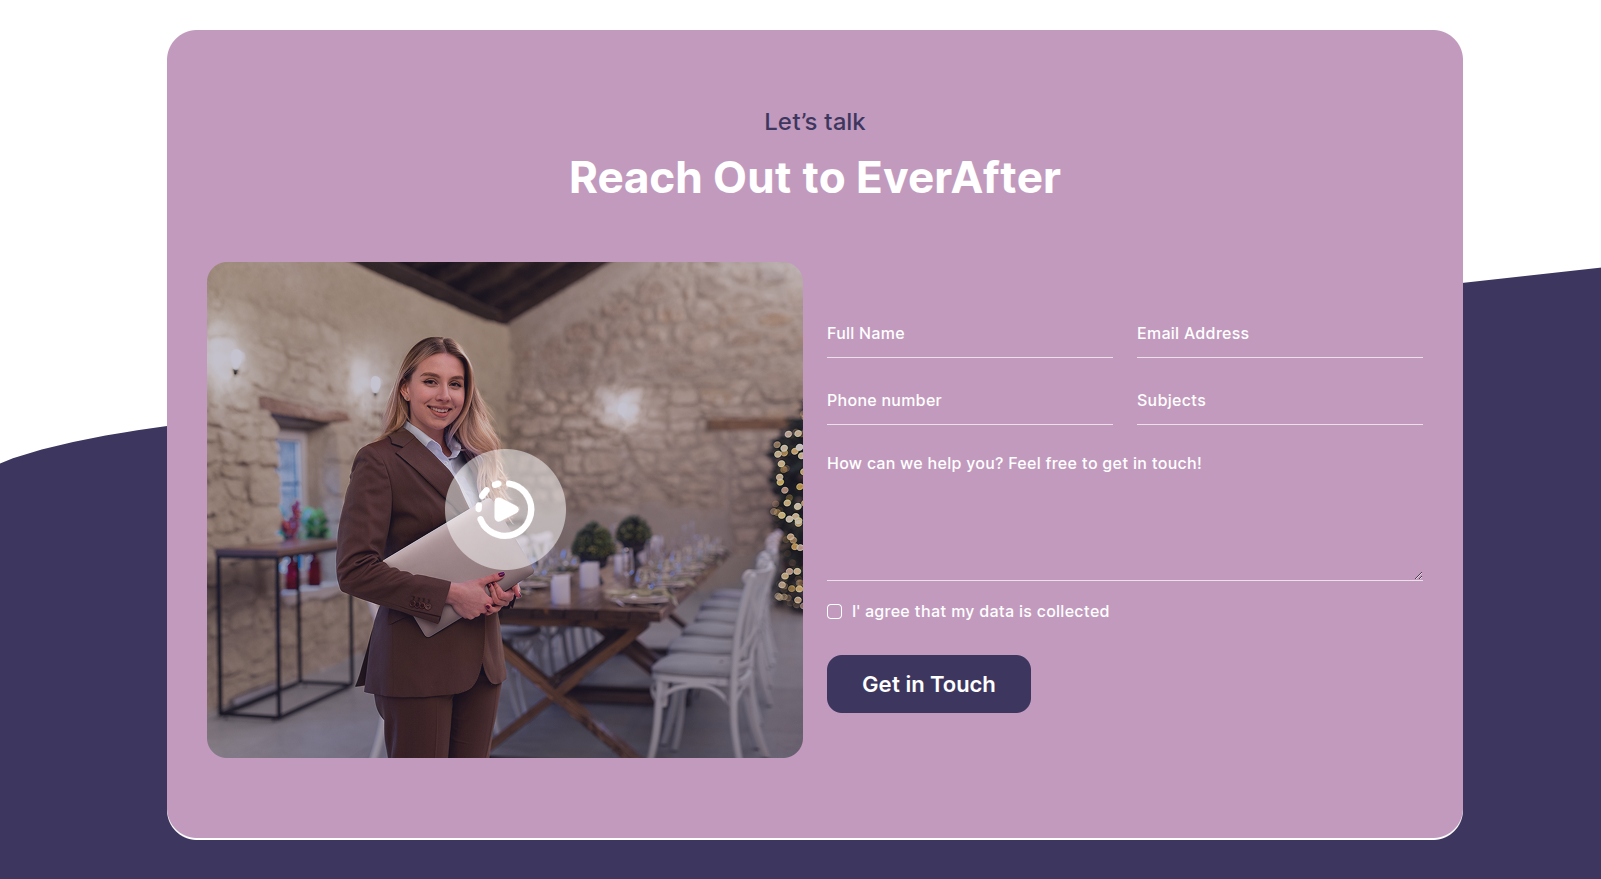
In front end, it will look like this.
Footer Setup Section
There are four columns in the footer. Any widget can be added there.
For Adding widgets first you have to add classic widget plugins.
1. In the Dashboard, go to Appearance >> Widgets
To add widgets to the footer, see the screenshot below.
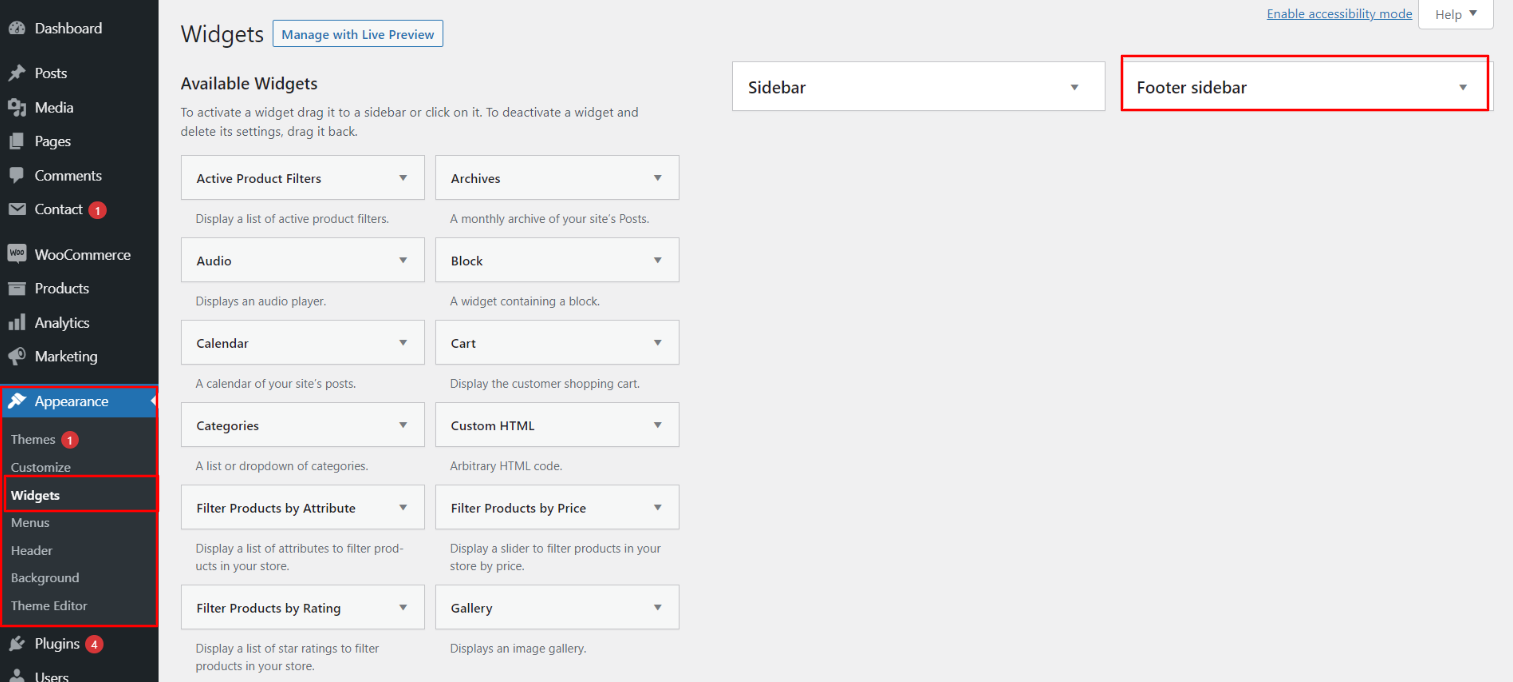
You can add footer columns by selecting widgets such as text, images, Recent posts and so on, which allow you to quickly add text or images of your choice.
In order to manage content for footer and add some widgets, navigate to, follow the instructions given below.
2. In the Dashboard, go to Appearance >> Widgets >> Footer Widgets
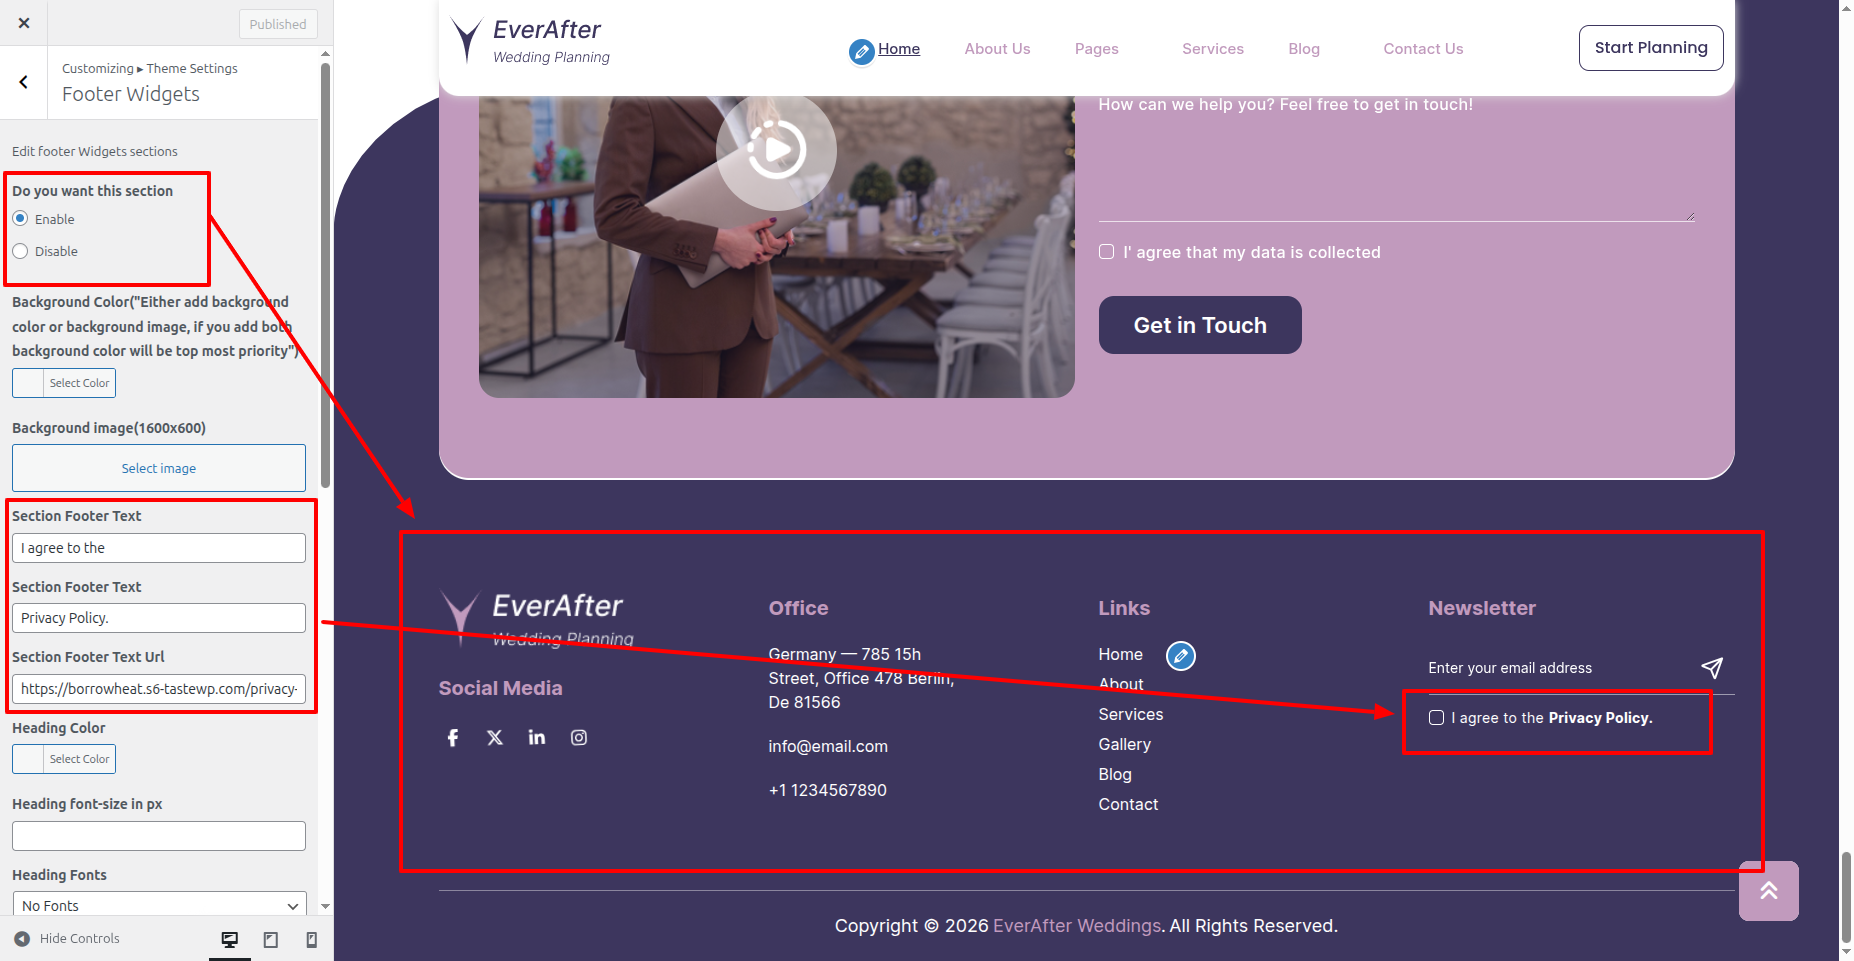
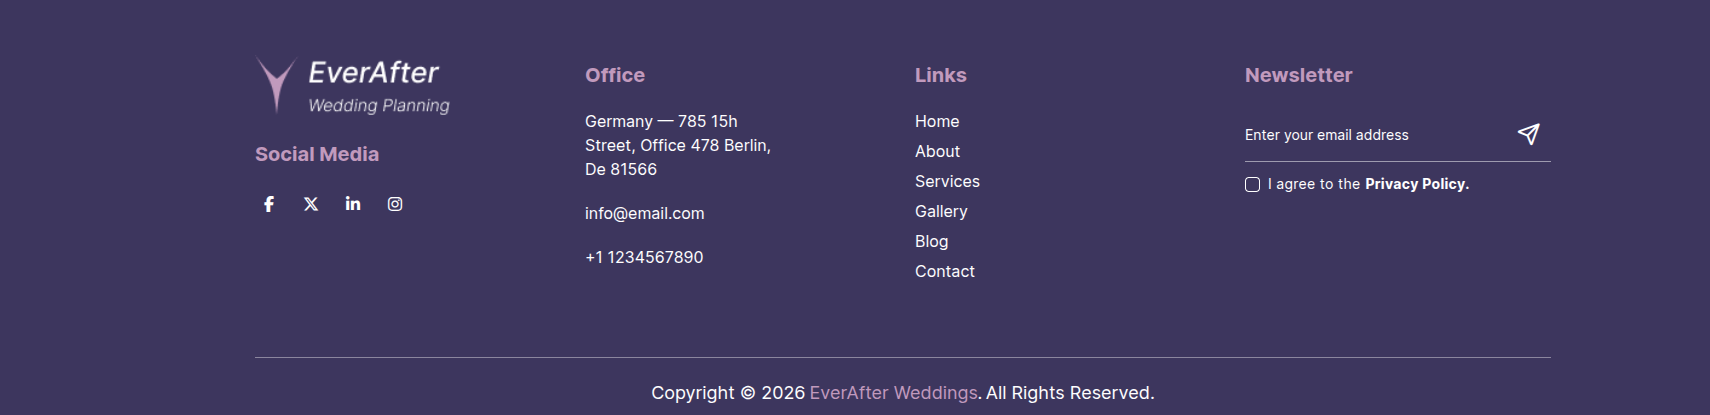
Your footer will appear like this once you have added widgets to it.
Footer Copyright Text
Copyright Text
In order to proceed with footer Settings, You can fill the copyright content to footer copyright Settings.
In the Dashboard, go to Appearance >> Customize >> Theme Settings >> Footer Text
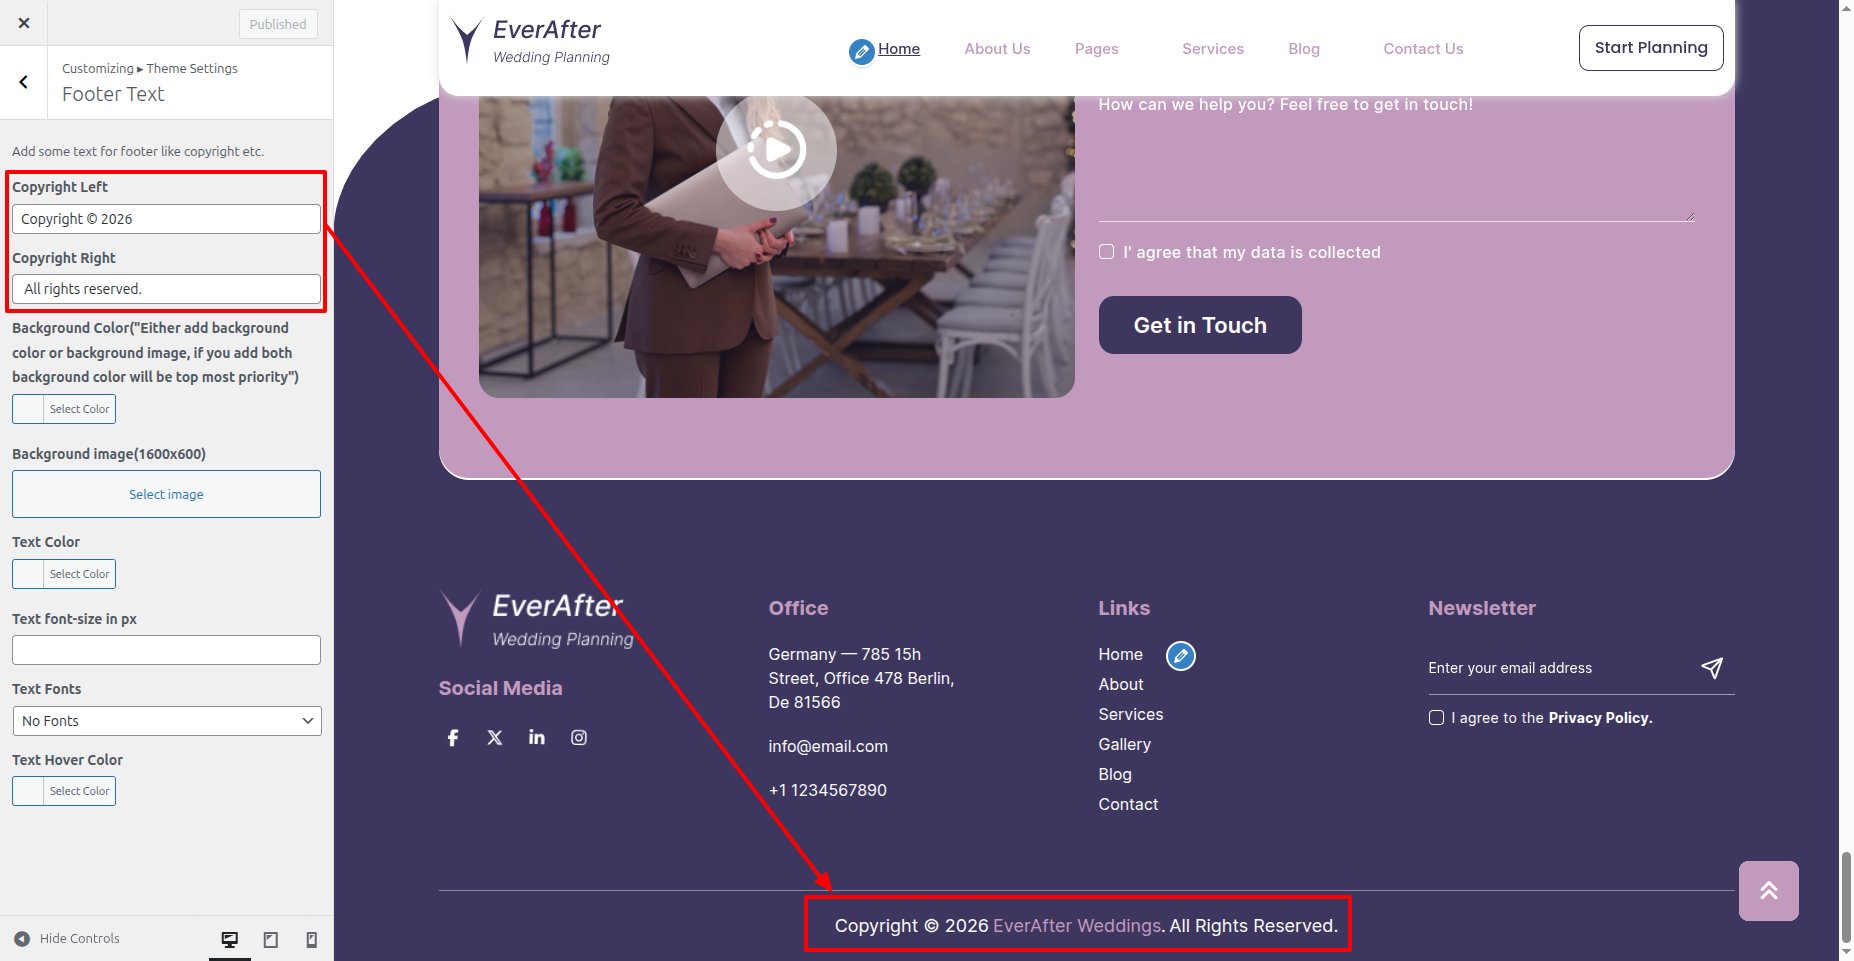
In front end, it will look like this.